All areas of the Robobo Scratch 3 window are common to any version of Scratch 3, but with some specific elements. The main one is observed in the left zone of the window, in the green button “Robobo”, where Robobo’s specific blocks are located. When clicking this button, as explained on the “Initial Setup” page, the browser window will look similar to this one:
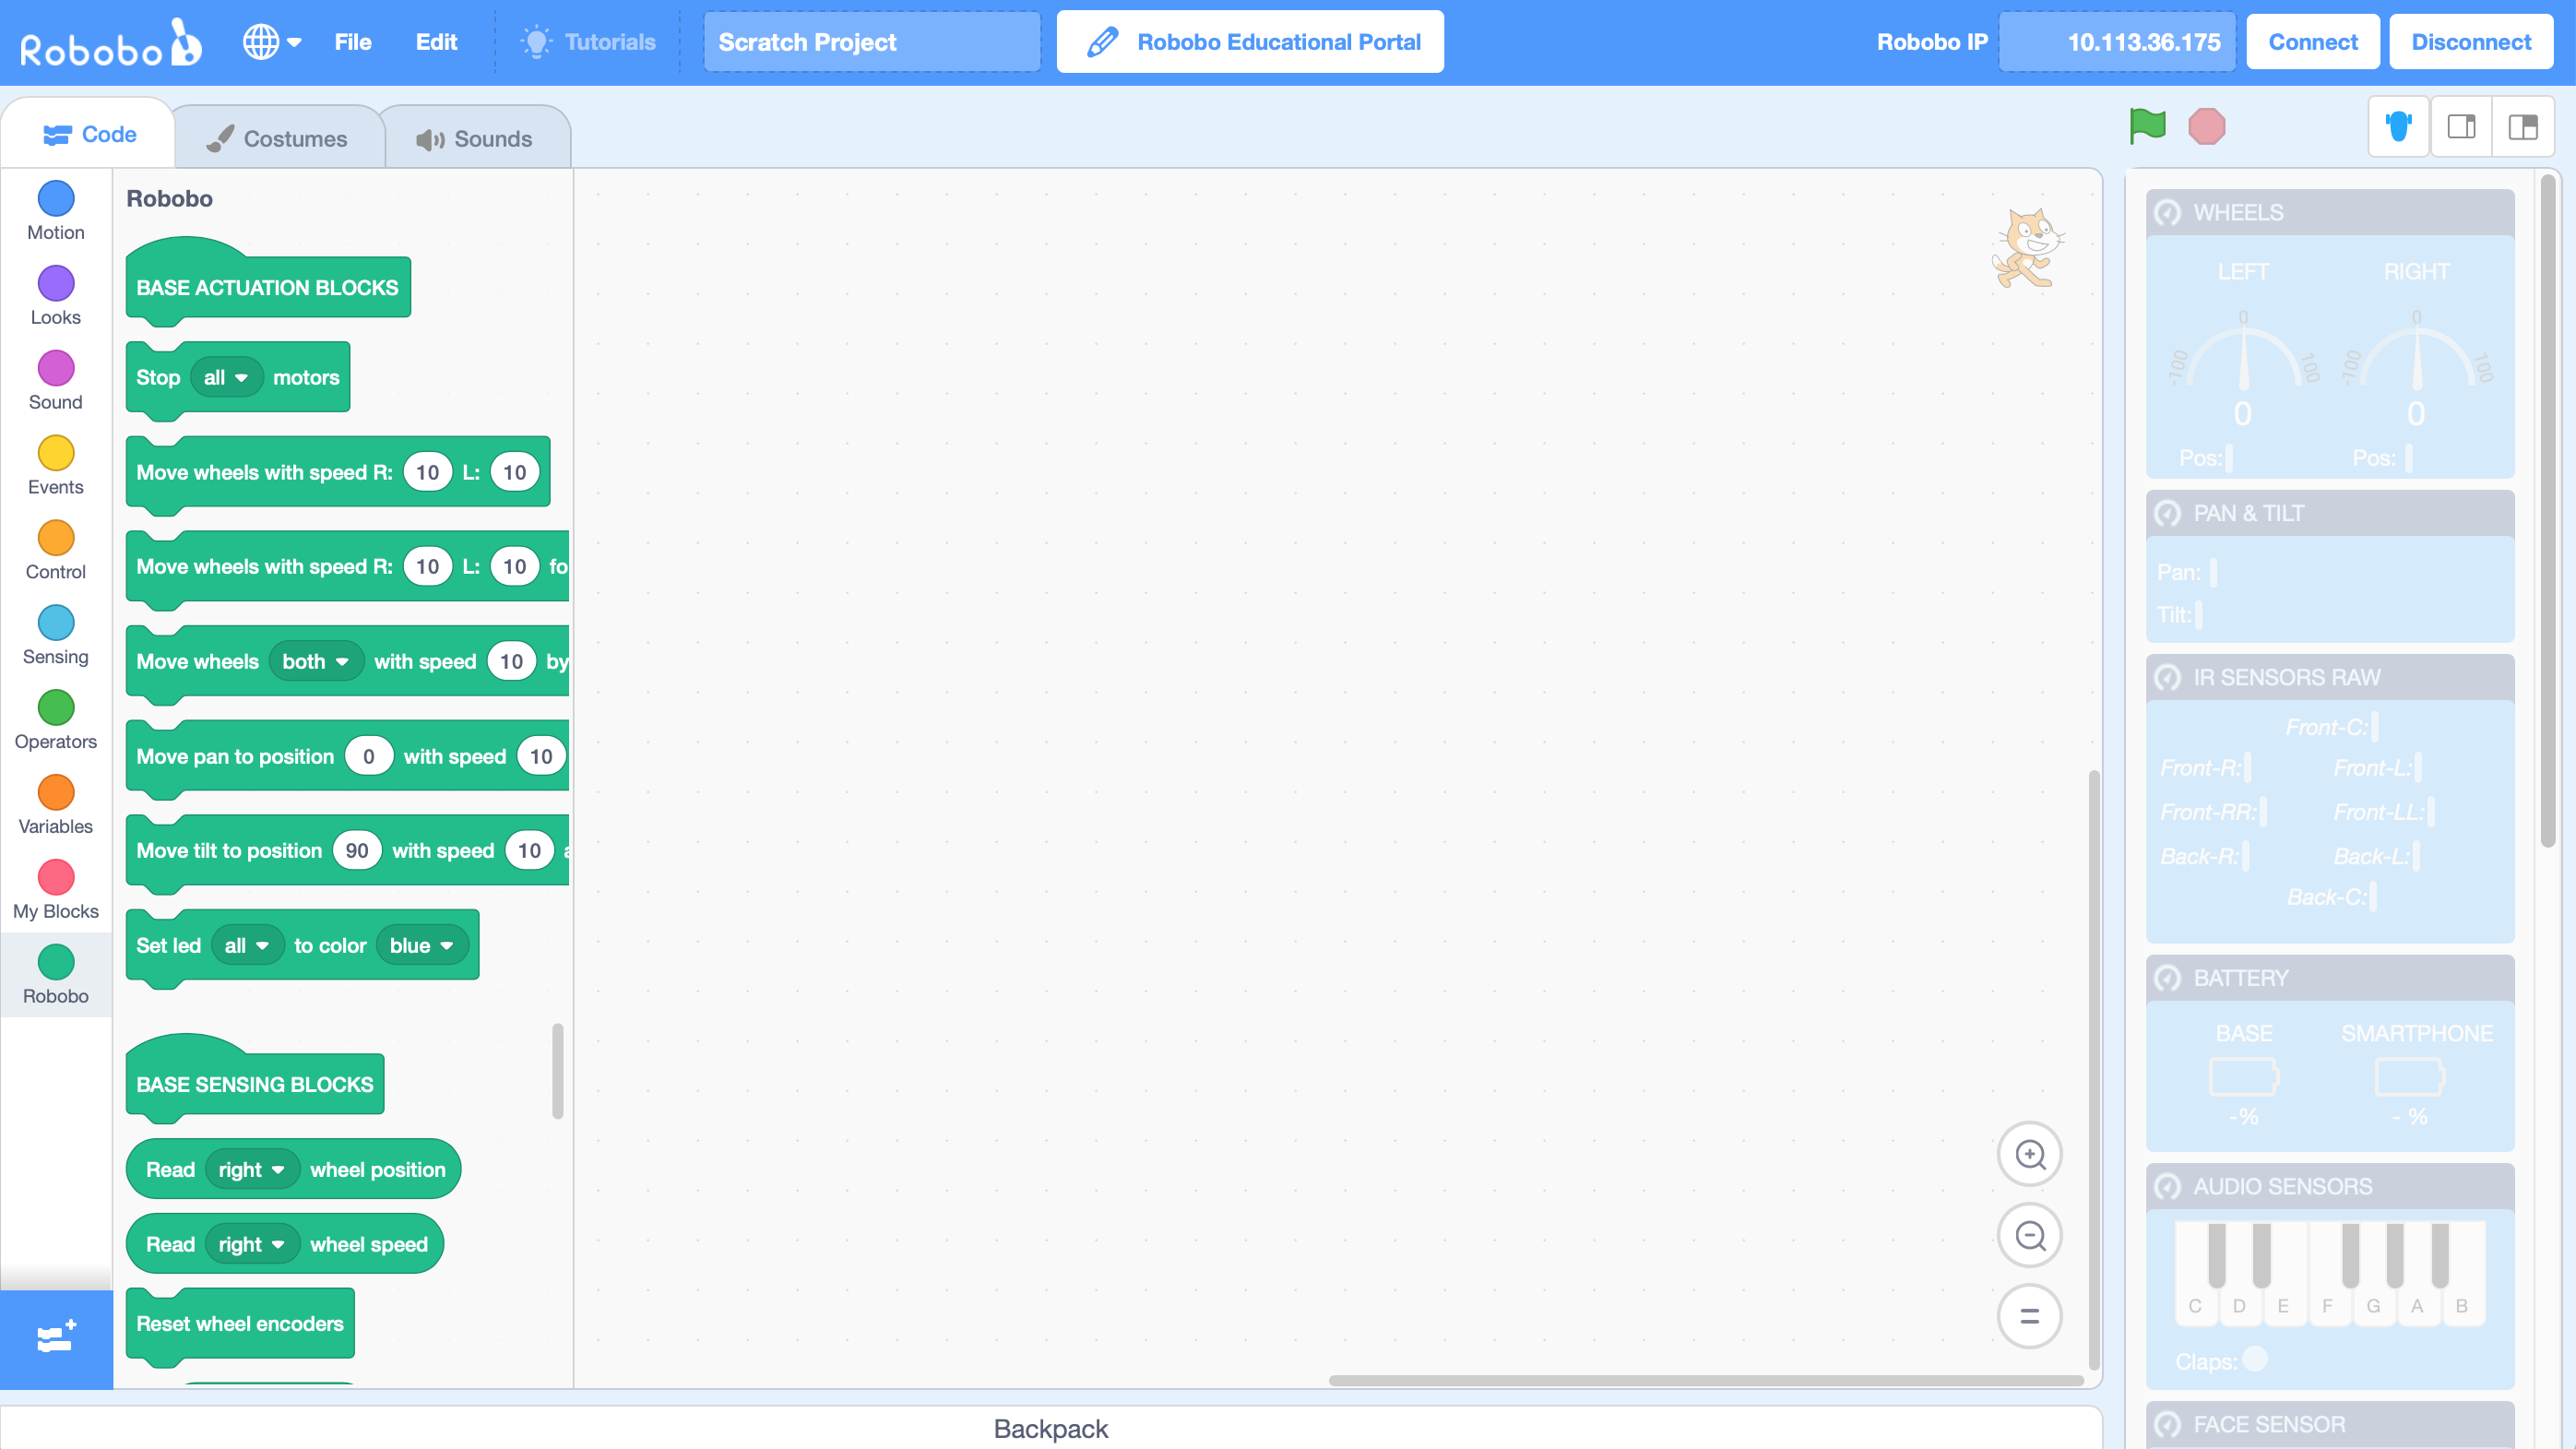
ROBOBO BLOCKS
These blocks are organized in 5 main types, divided with a block in capital letters:
- Base acting blocks:
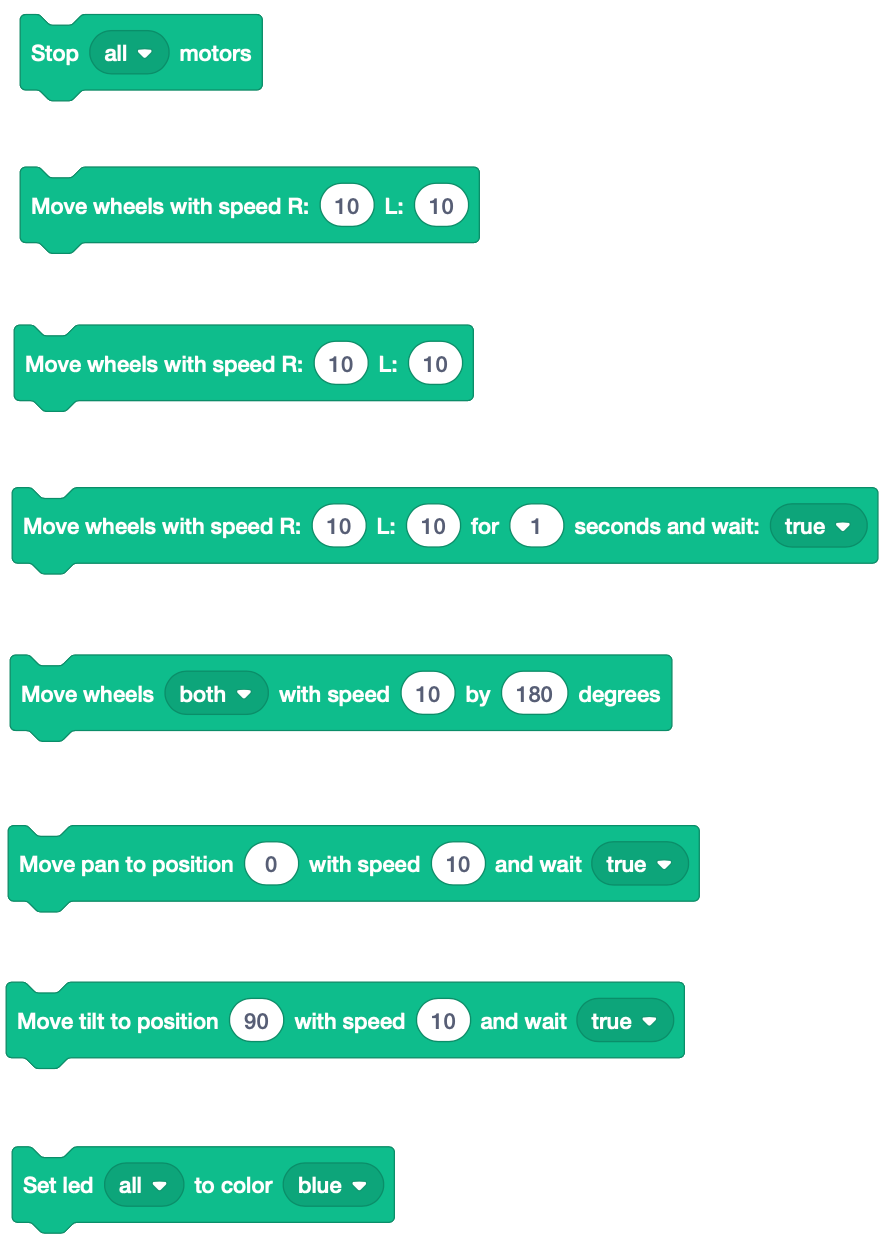
- Base sensing blocks:
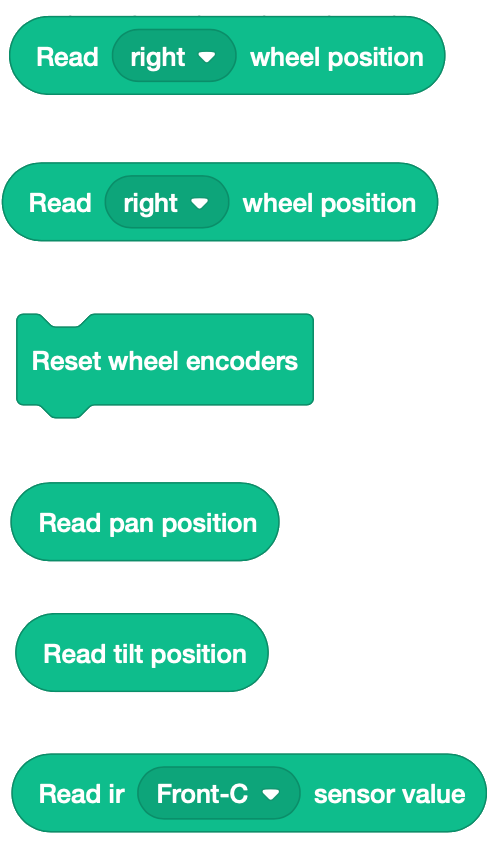
- Smartphone acting blocks:
- Smartphone sensing blocks:
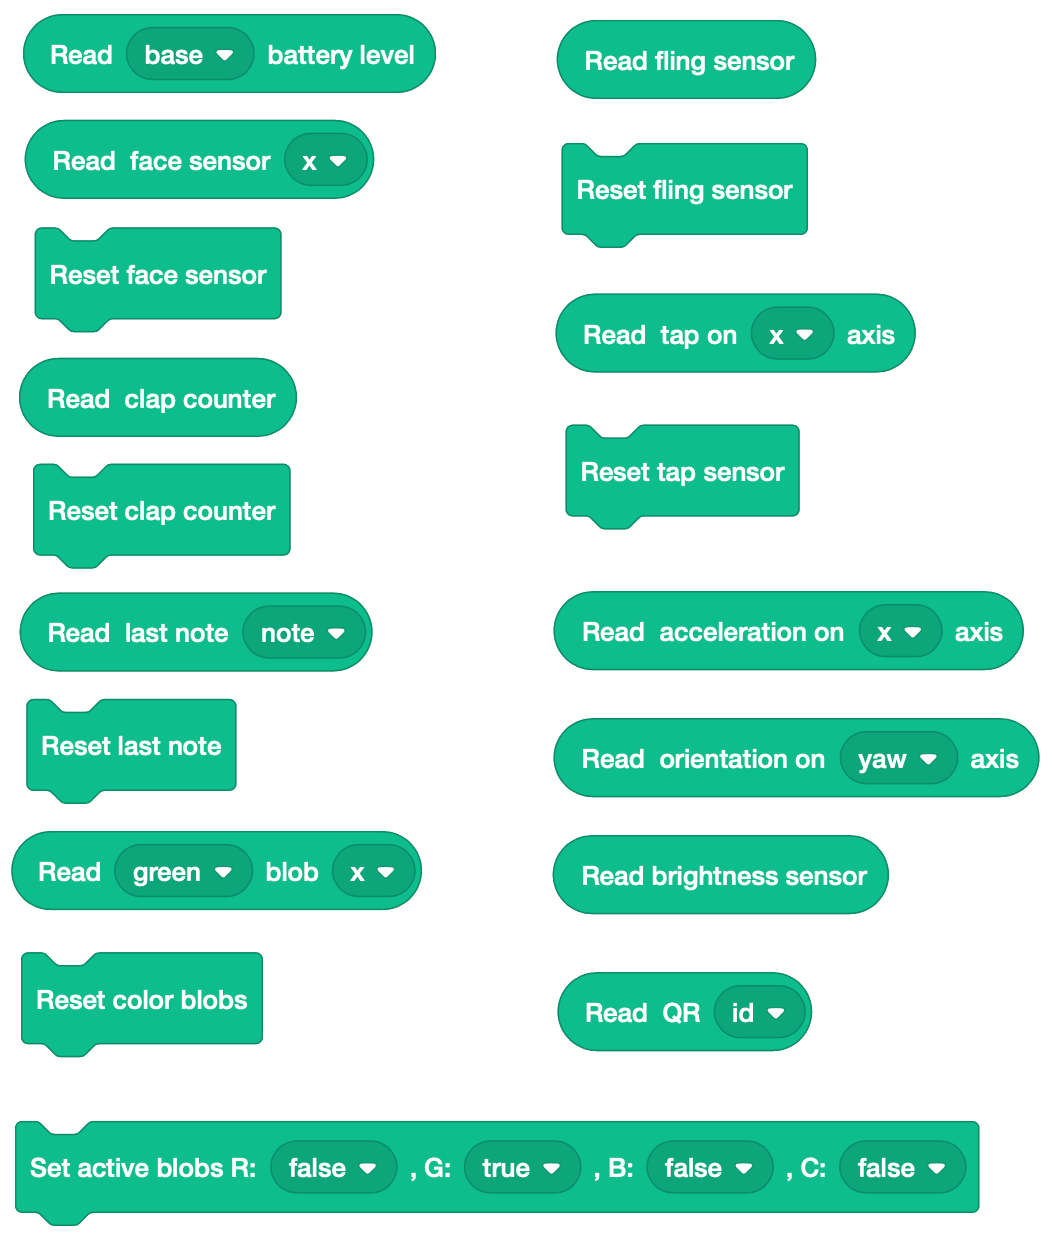
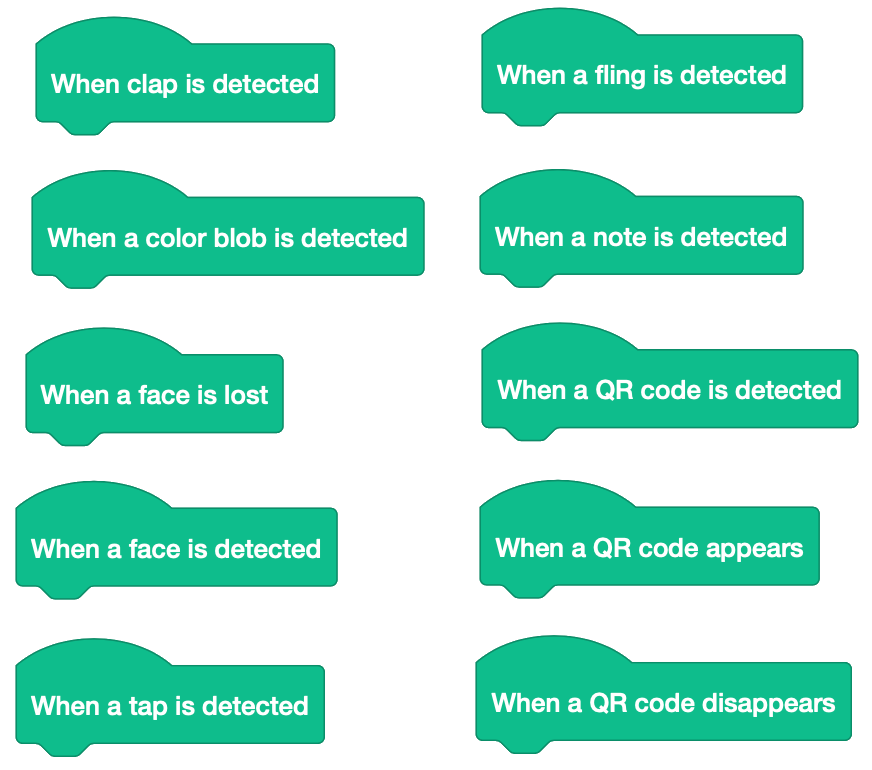
- Hat blocks (sensor blocks that are permanently reading the sensor):
The functionality of these blocks is explained in the different sections of this manual which can be accessed from the menu on the left, their use being typical of any Scratch block, so that they must be dragged to the programming area (central area of the window) and executed like any other block.
OPTIONS BAR
In the upper part of the Scratch 3 window we can see, on the left, the Language Selection, File and Edit buttons, typical of any version of this language:
- Language selection: allows you to choose the language of the Scratch3 blocks. Robobo’s own blocks are only in English.
- File: allows to create a new project, load an existing one or save the current project.
- Edit: allows to activate the turbo mode, in which the programs are executed at the highest speed allowed by the computer.
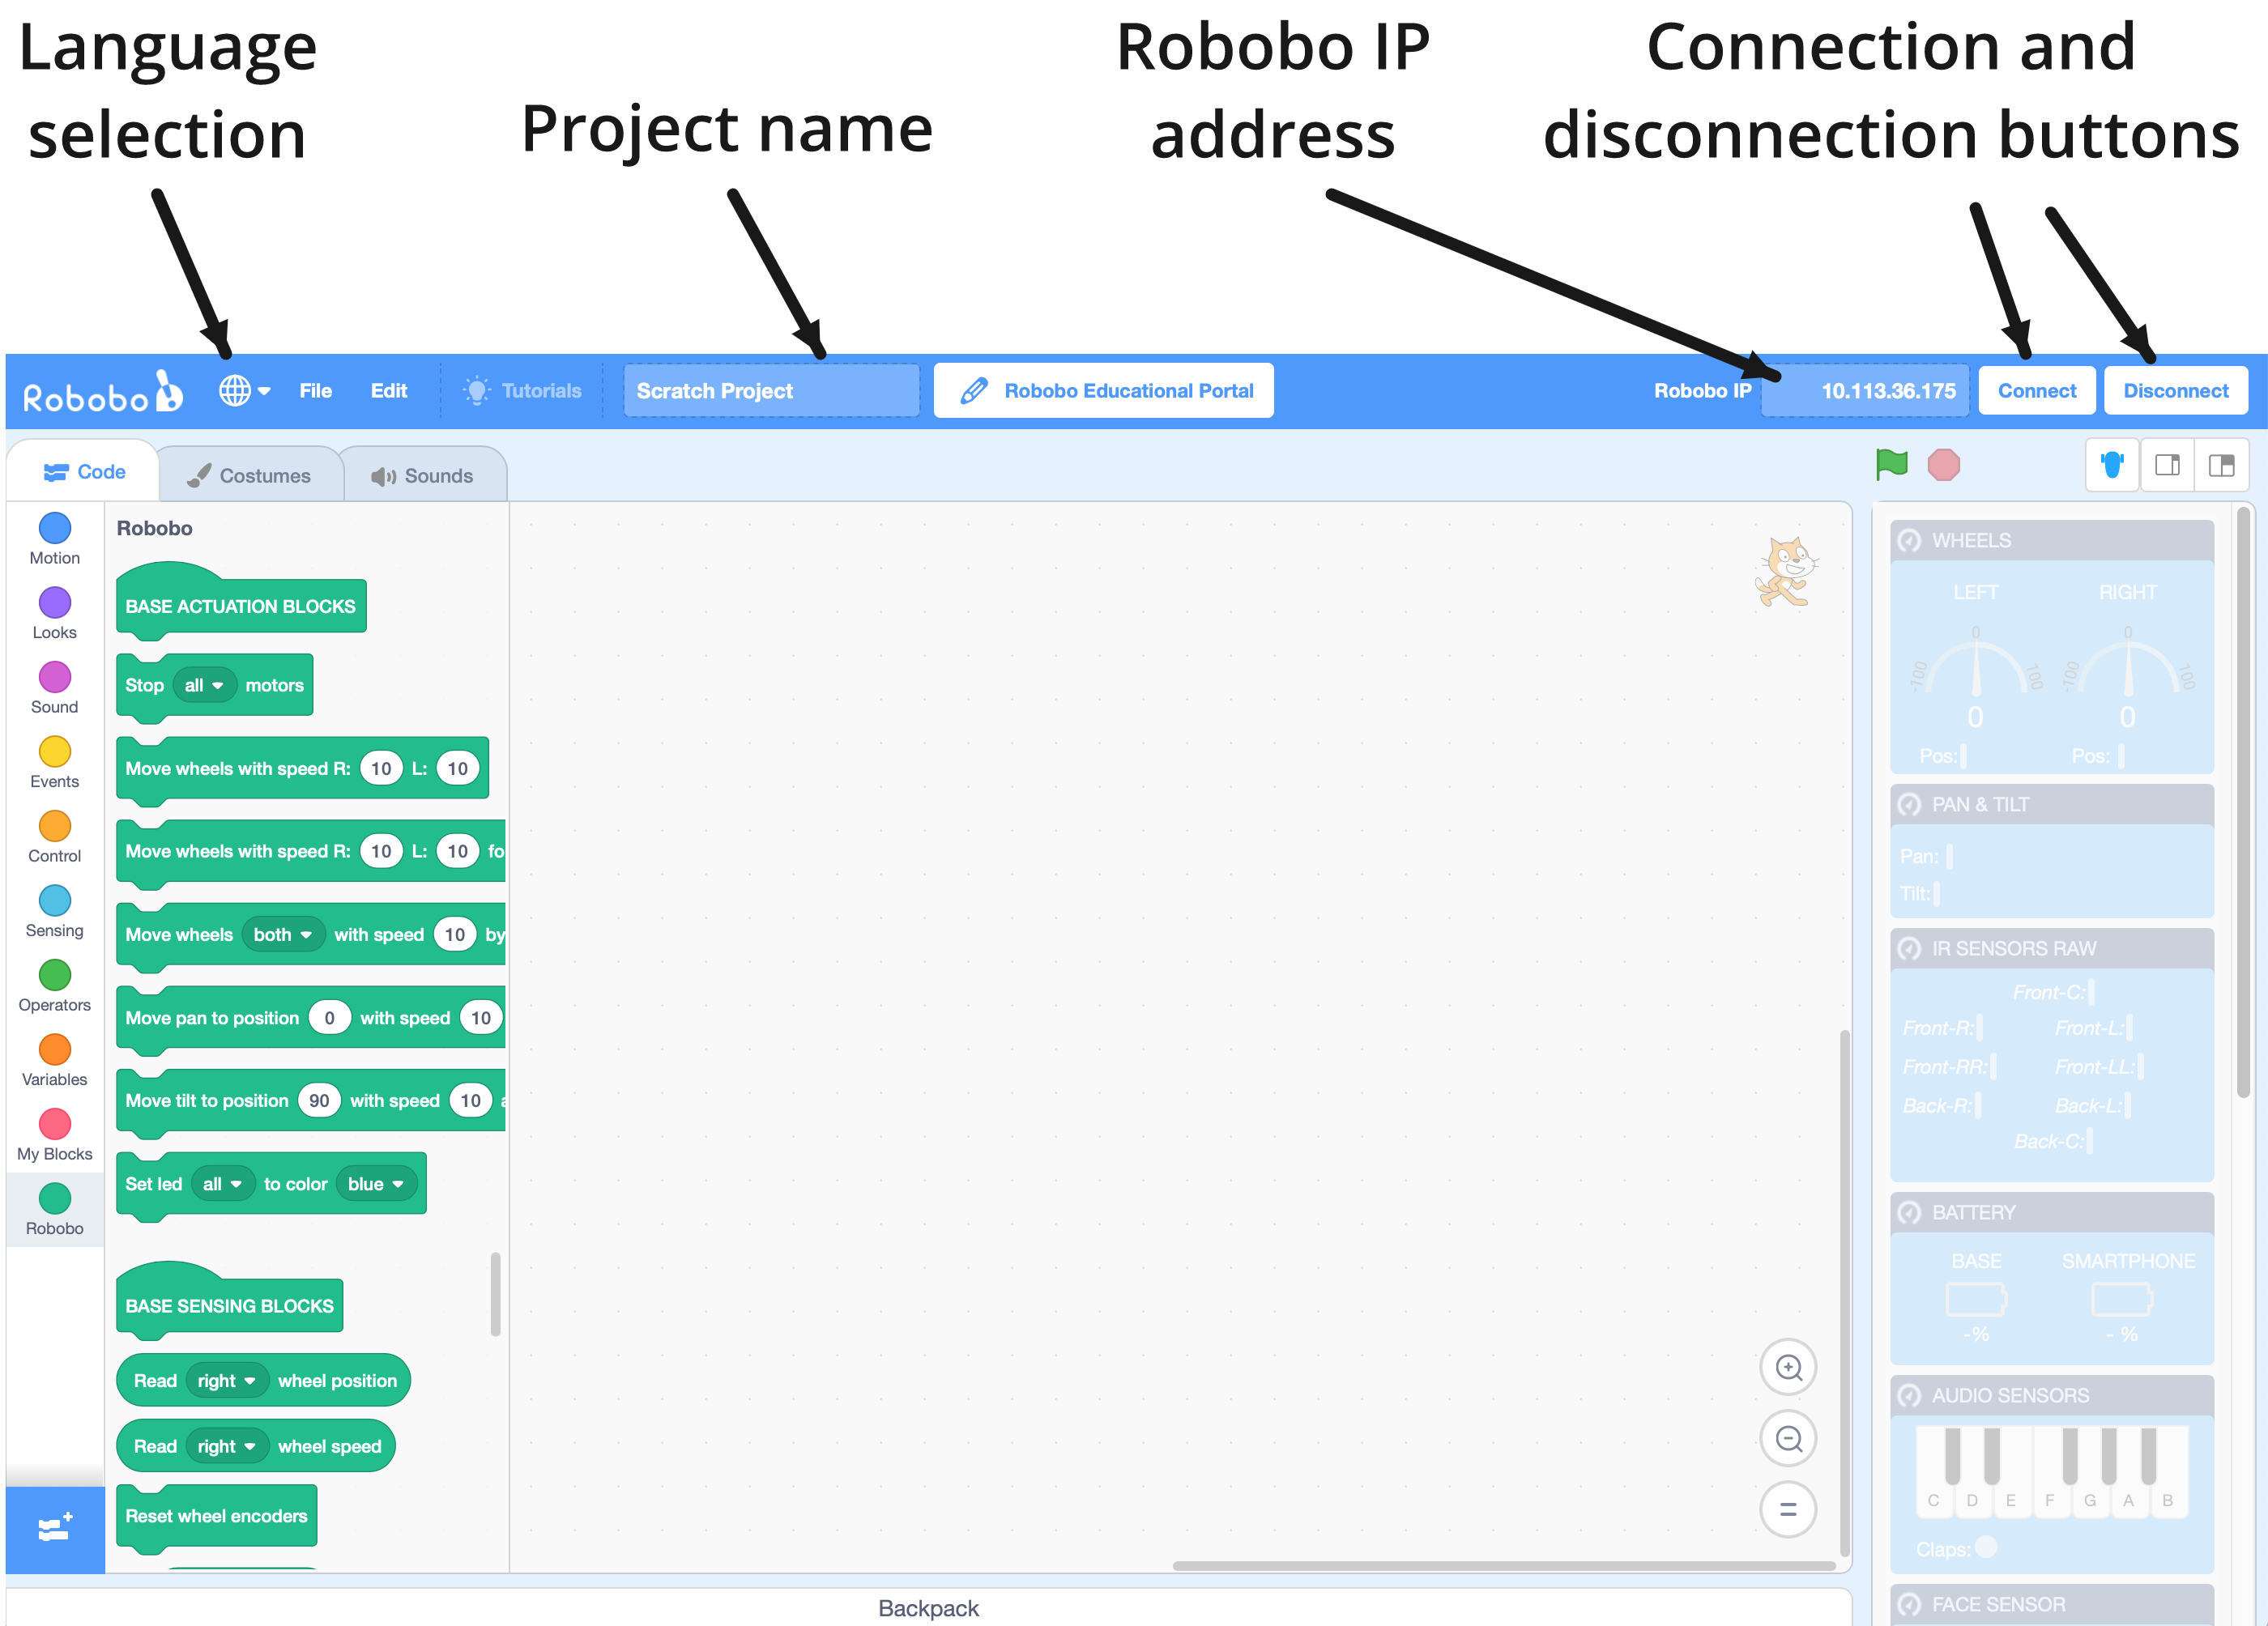
In the center of the bar we can see a box in which you can change the Project Name, and just next to it, a button that takes us to the Robobo Educational Portal, where we can consult the Robobo programming manual and where we have access to Robobo’s curriculum.
Finally, on the right side of the bar is the box where you enter the Robobo IP on the smartphone, and the connection and disconnection buttons. As explained in the initial setup section, to start programming with Robobo, we must enter in the “Robobo IP” field, the IP address shown in the initial menu of the Robobo smartphone app, and then click on the “Connect” button. To disconnect the Robobo computer, click on the “Disconnect” button.
MONITORING WINDOW
On the right side of the Scratch 3 sale we have an icon with the shape of Robobo, if we click on it, it will open the monitoring window, as shown in the following image:
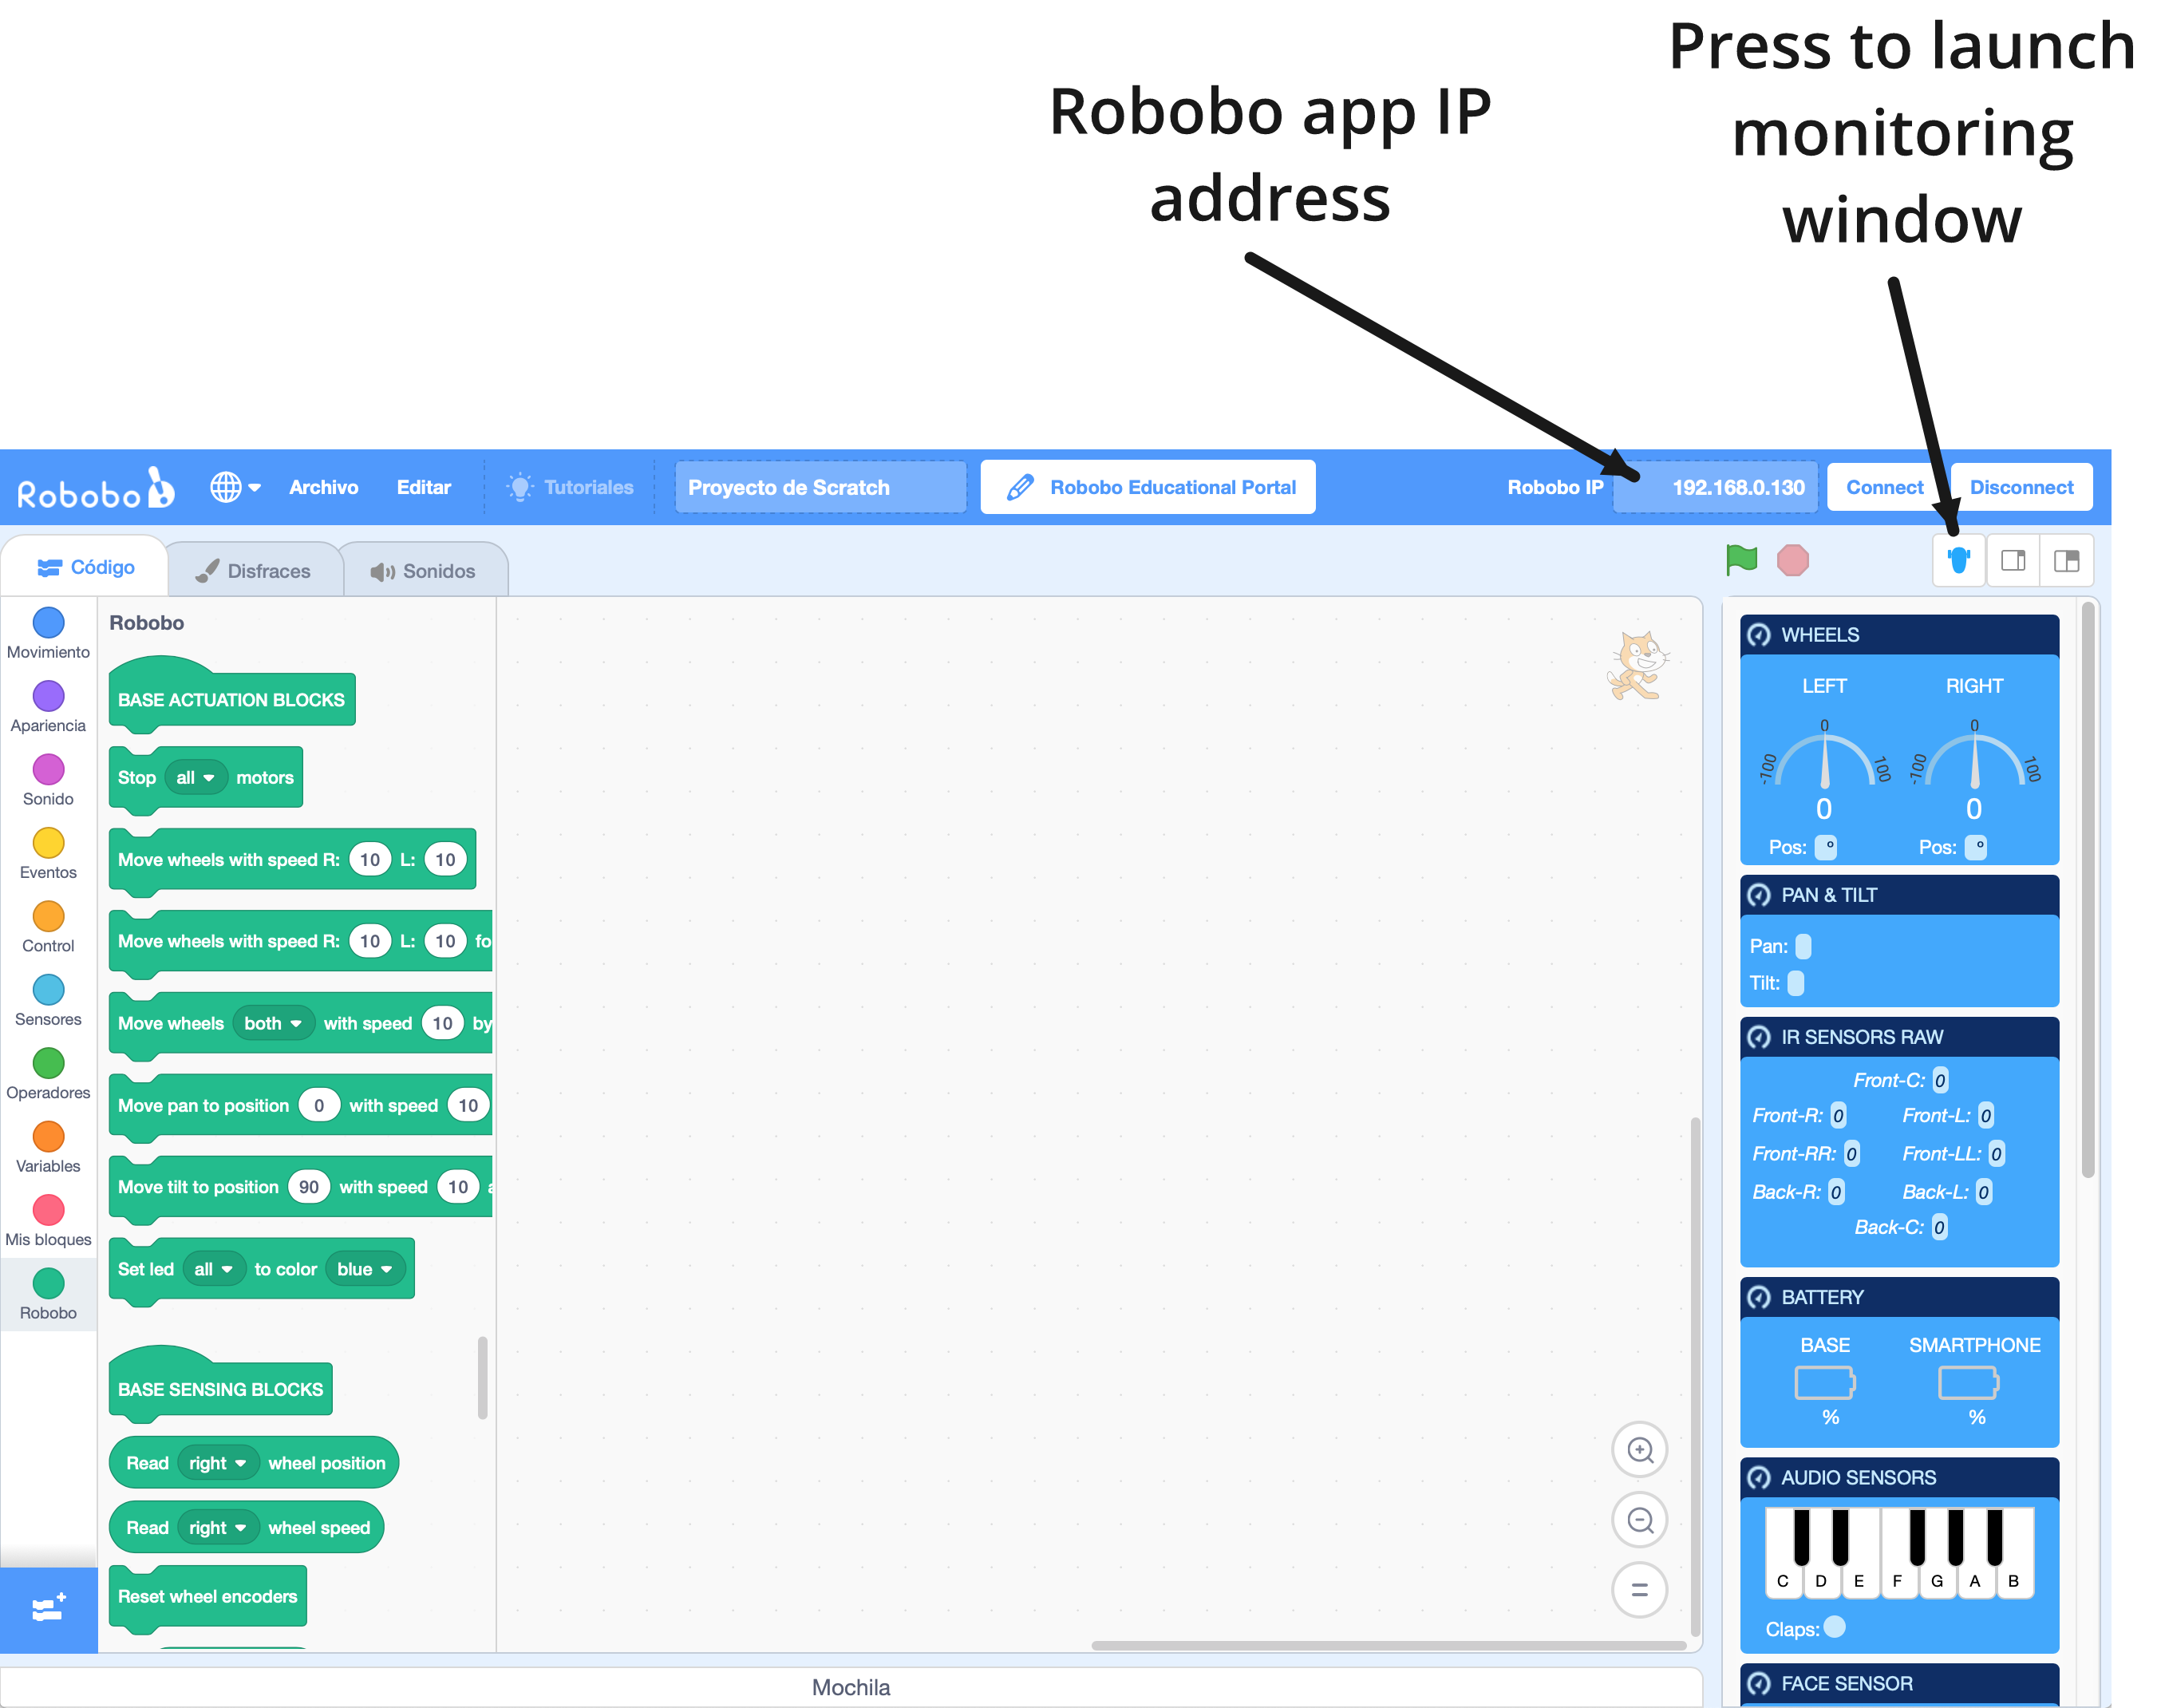
By putting the IP address that appears in the Robobo app in the “Robobo IP” field of the Scratch3 window (see previous image), and clicking on the “Connect” button, we will be able to see the values that Robobo’s sensors return in real time.
Specifically, this window shows the following Robobo sensors, which correspond to those that can be read using the Robobo blocks explained in this manual. The range of each sensor must be consulted in the section corresponding to each sensor:
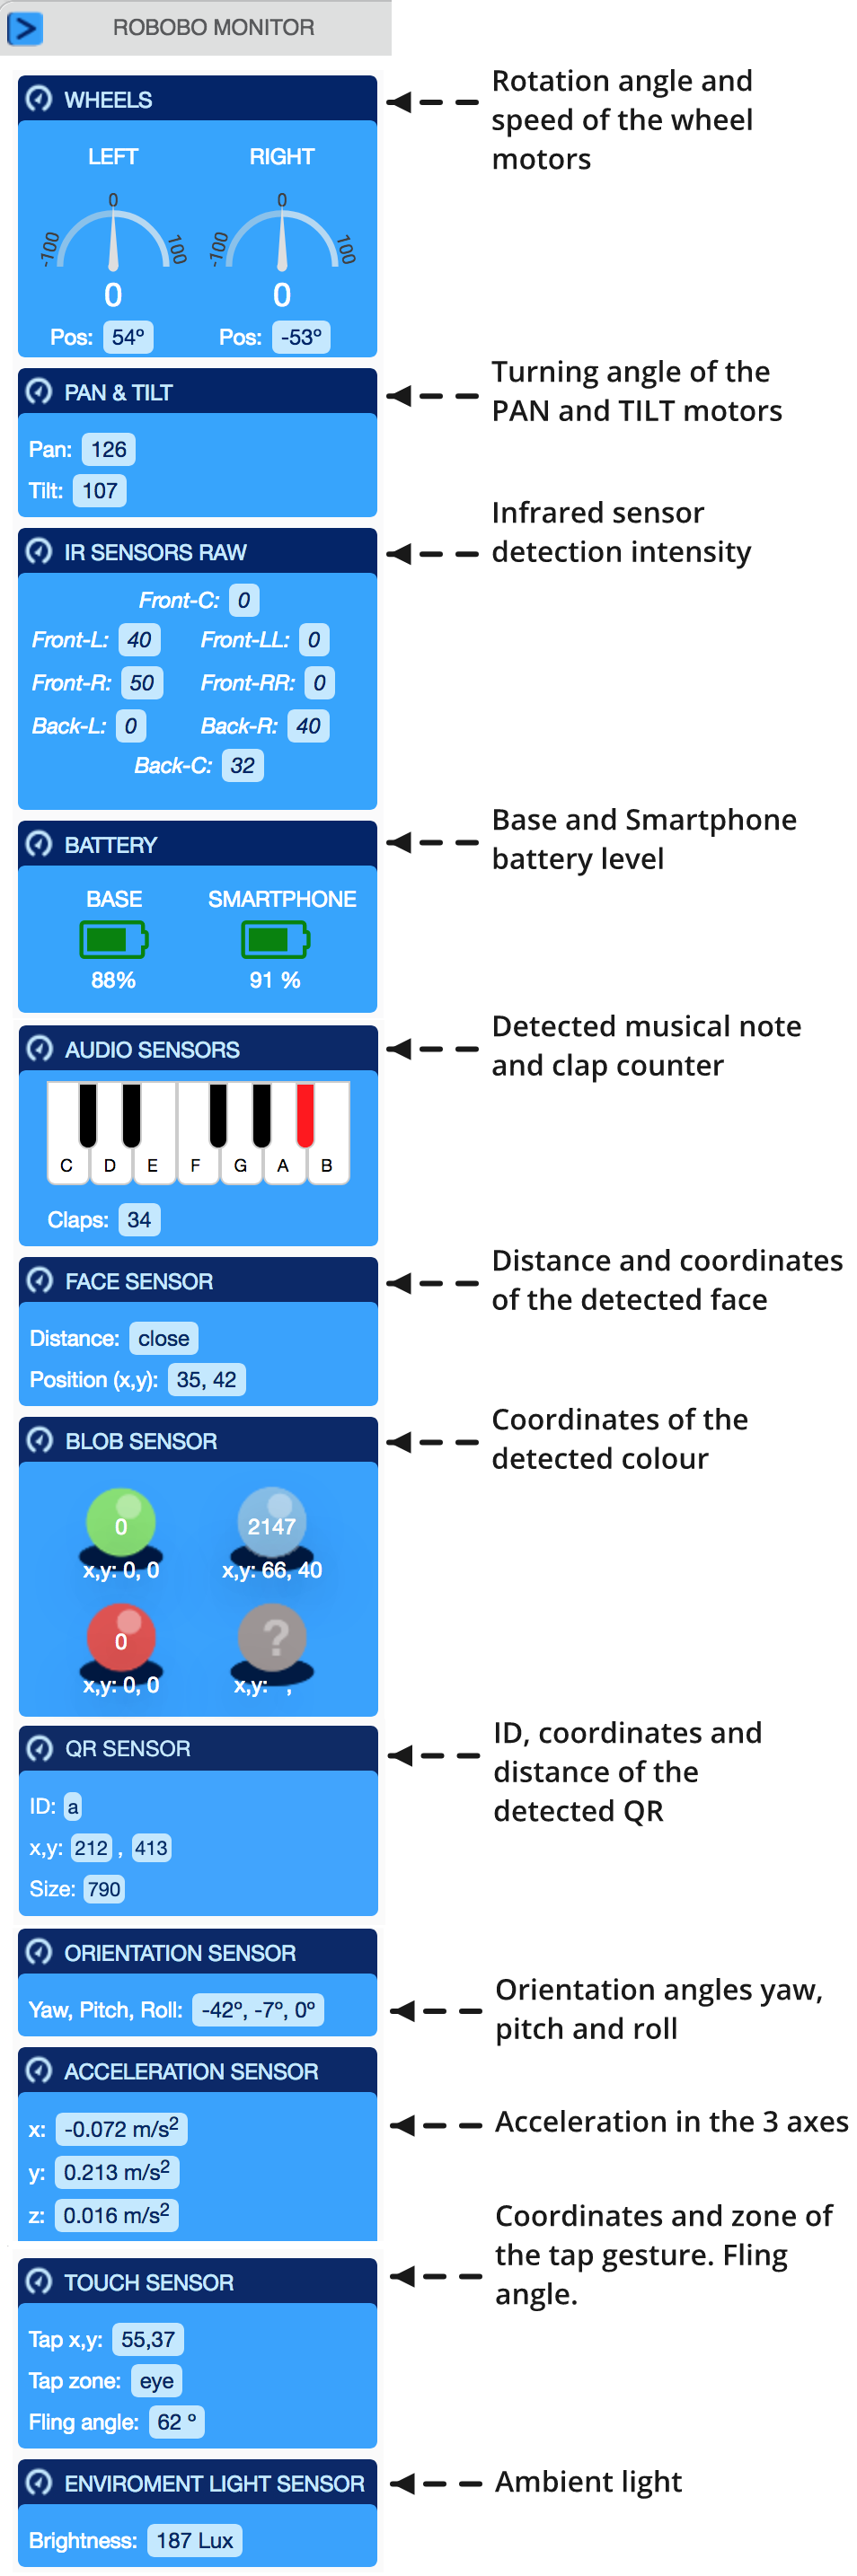
The use of this window is recommended when developing the programs, since it allows to know in real time the exact values that Robobo is perceiving, something essential to achieve useful behaviors.