To program Robobo, it is necessary to follow the steps explained in the initial configuration page. The current page simply shows the different options the app has, but its use to program Robobo is not explained here.
IMPORTANT: this page is related to the Robobo app, required to program in Scratch or Python. To program the robot in ROS, you have to use the Robobo developer app, which is explained in the ROS section of the Robobo wiki.
The Robobo app can be downloaded from Google Play. It is important to read the app considerations that appear on this page to ensure that the smartphone you wish to use with Robobo is compatible. Once downloaded and installed, the following main screen appears when you start the application:
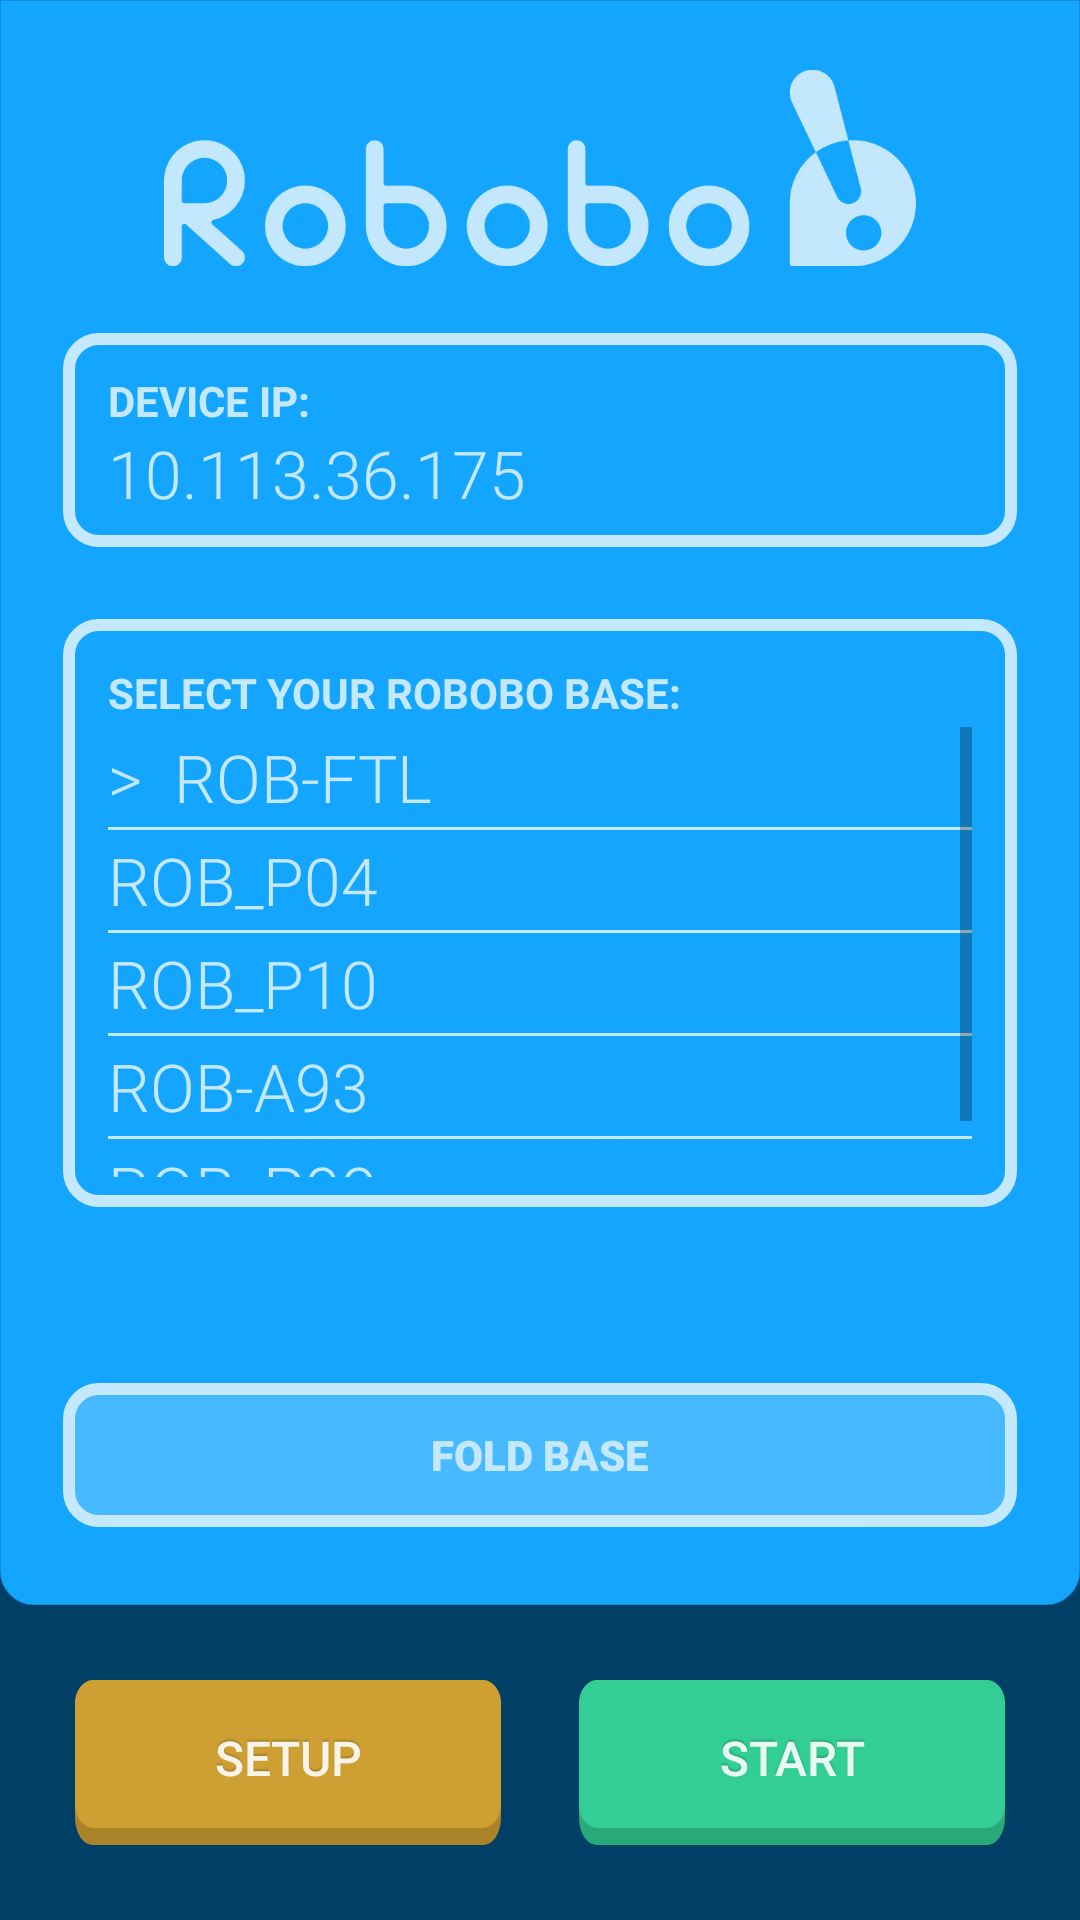
It shows, in the upper part, the device IP (smartphone) in the WI-FI to which it is connected (review the steps explained in the initial configuration page) and that it should be used in Scratch or Python to connect with the computer. In the central area of the screen we can see the Robobo base selection box, which shows a larger or smaller list depending on how many different bases we have connected to the Smartphone before (for the first time, only one Robobo base should be present in the list).
In the lower part we can see the action buttons:
- The SETUP button allows us to access the different configuration options of the app and the base.
- The START button starts the programming mode. To do this, you must select the corresponding base name on the list, and then click on start. If the Robobo base is the correct one, it is on, and within the Bluetooth range, the connection will be established and the following screen will appear:

This screen represents the programming mode, that is, it will be present while are programming with Scratch or Python. If we press the back button of the smartphone, we will return to the initial screen.
Pressing now the SETUP button, it takes us to the following options screen:
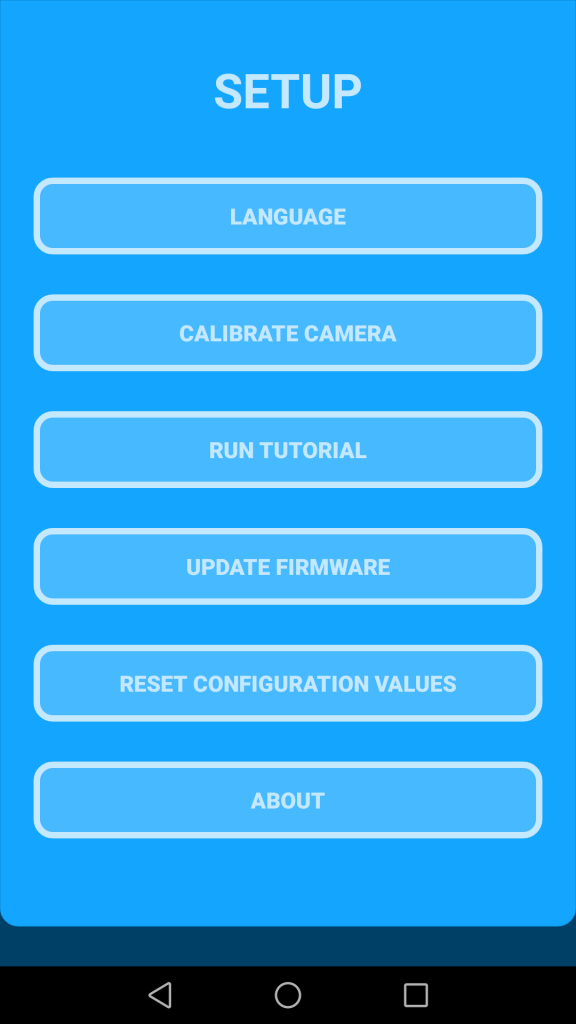
Each of these options is explained in more detail in the following sections.
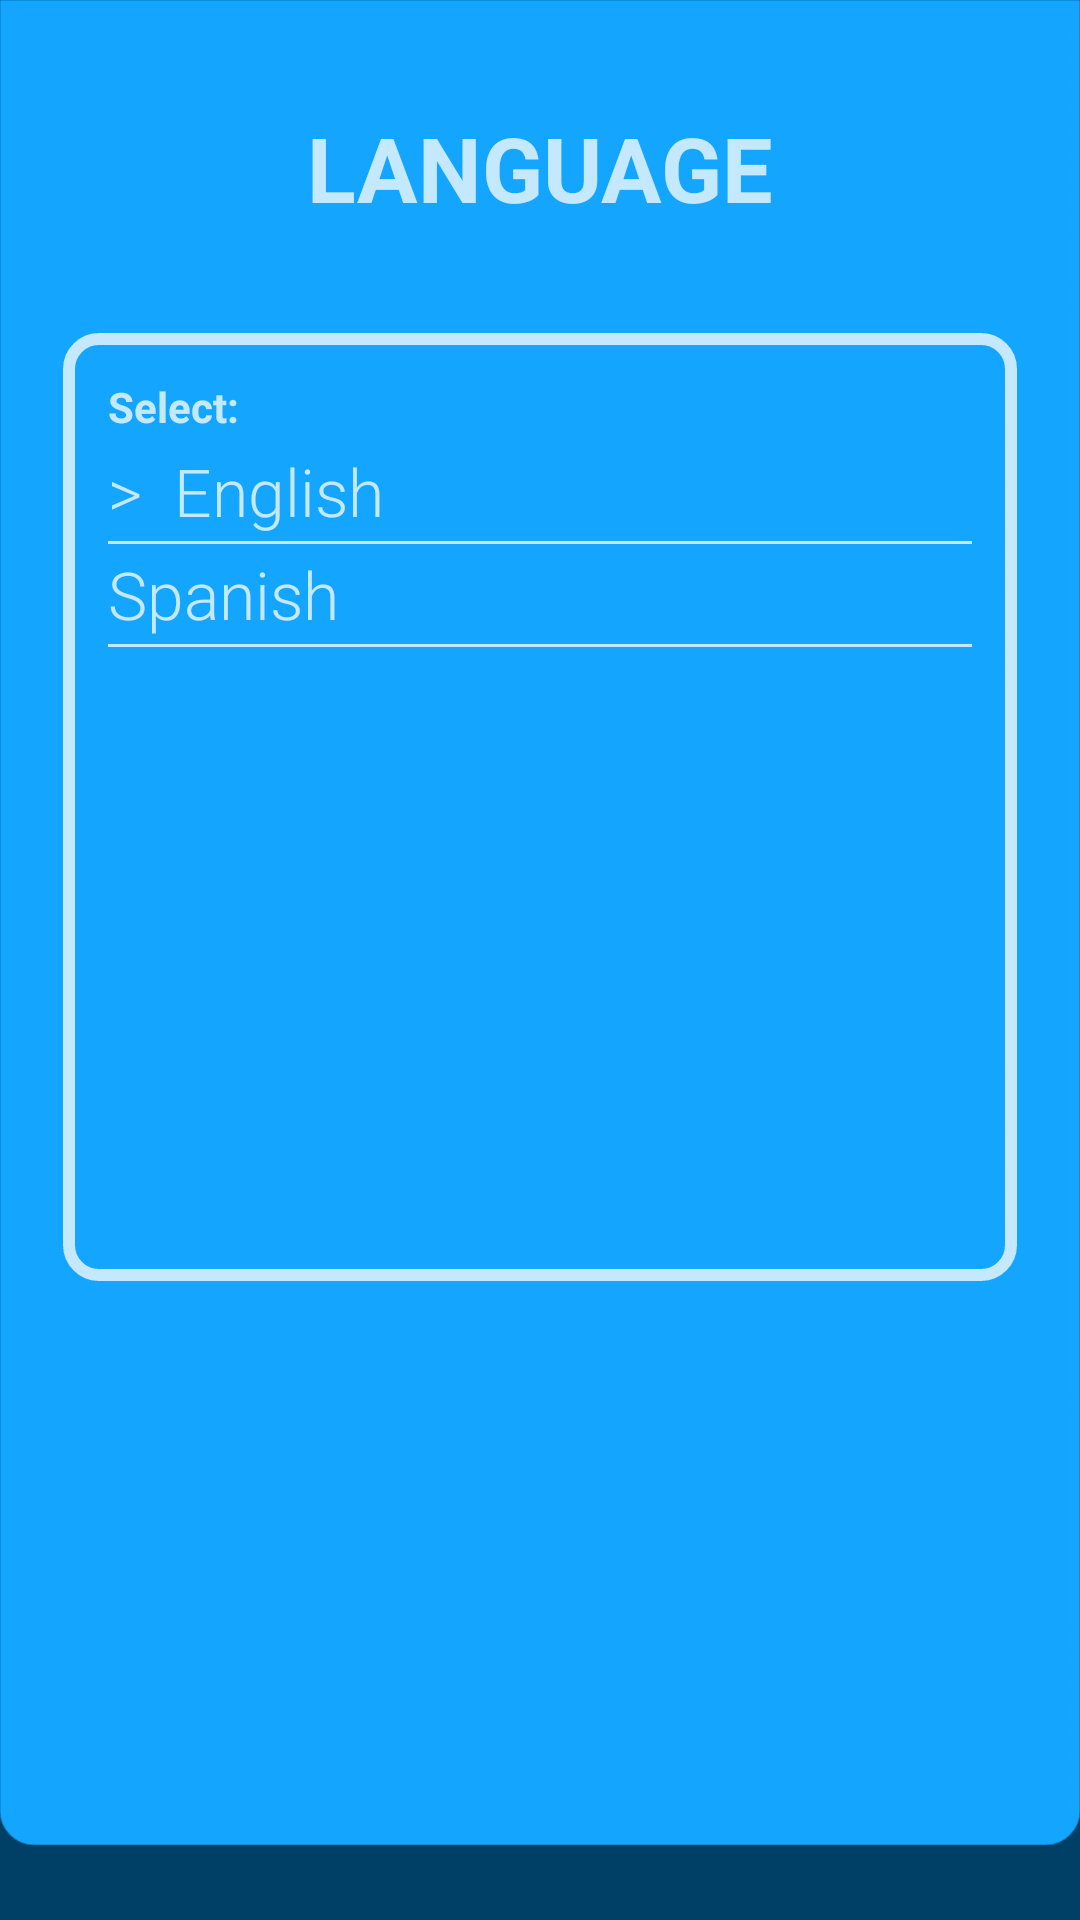
LANGUAGE SELECTION
It allows to select the language that Robobo will use in the voice production blocks (this option does not change the language of the app menus):
CAMERA CALIBRATION
It allows to calibrate the colors detected by the color detection blocks in Scratch3 and corresponding methods in Python.
The color calibration is very important for the color detection to work correctly, since there is a very large influence of the ambient light level on the color values. When clicking on this option, a screen opens showing us the image captured by the front camera of the smartphone with a white circular area in the middle:
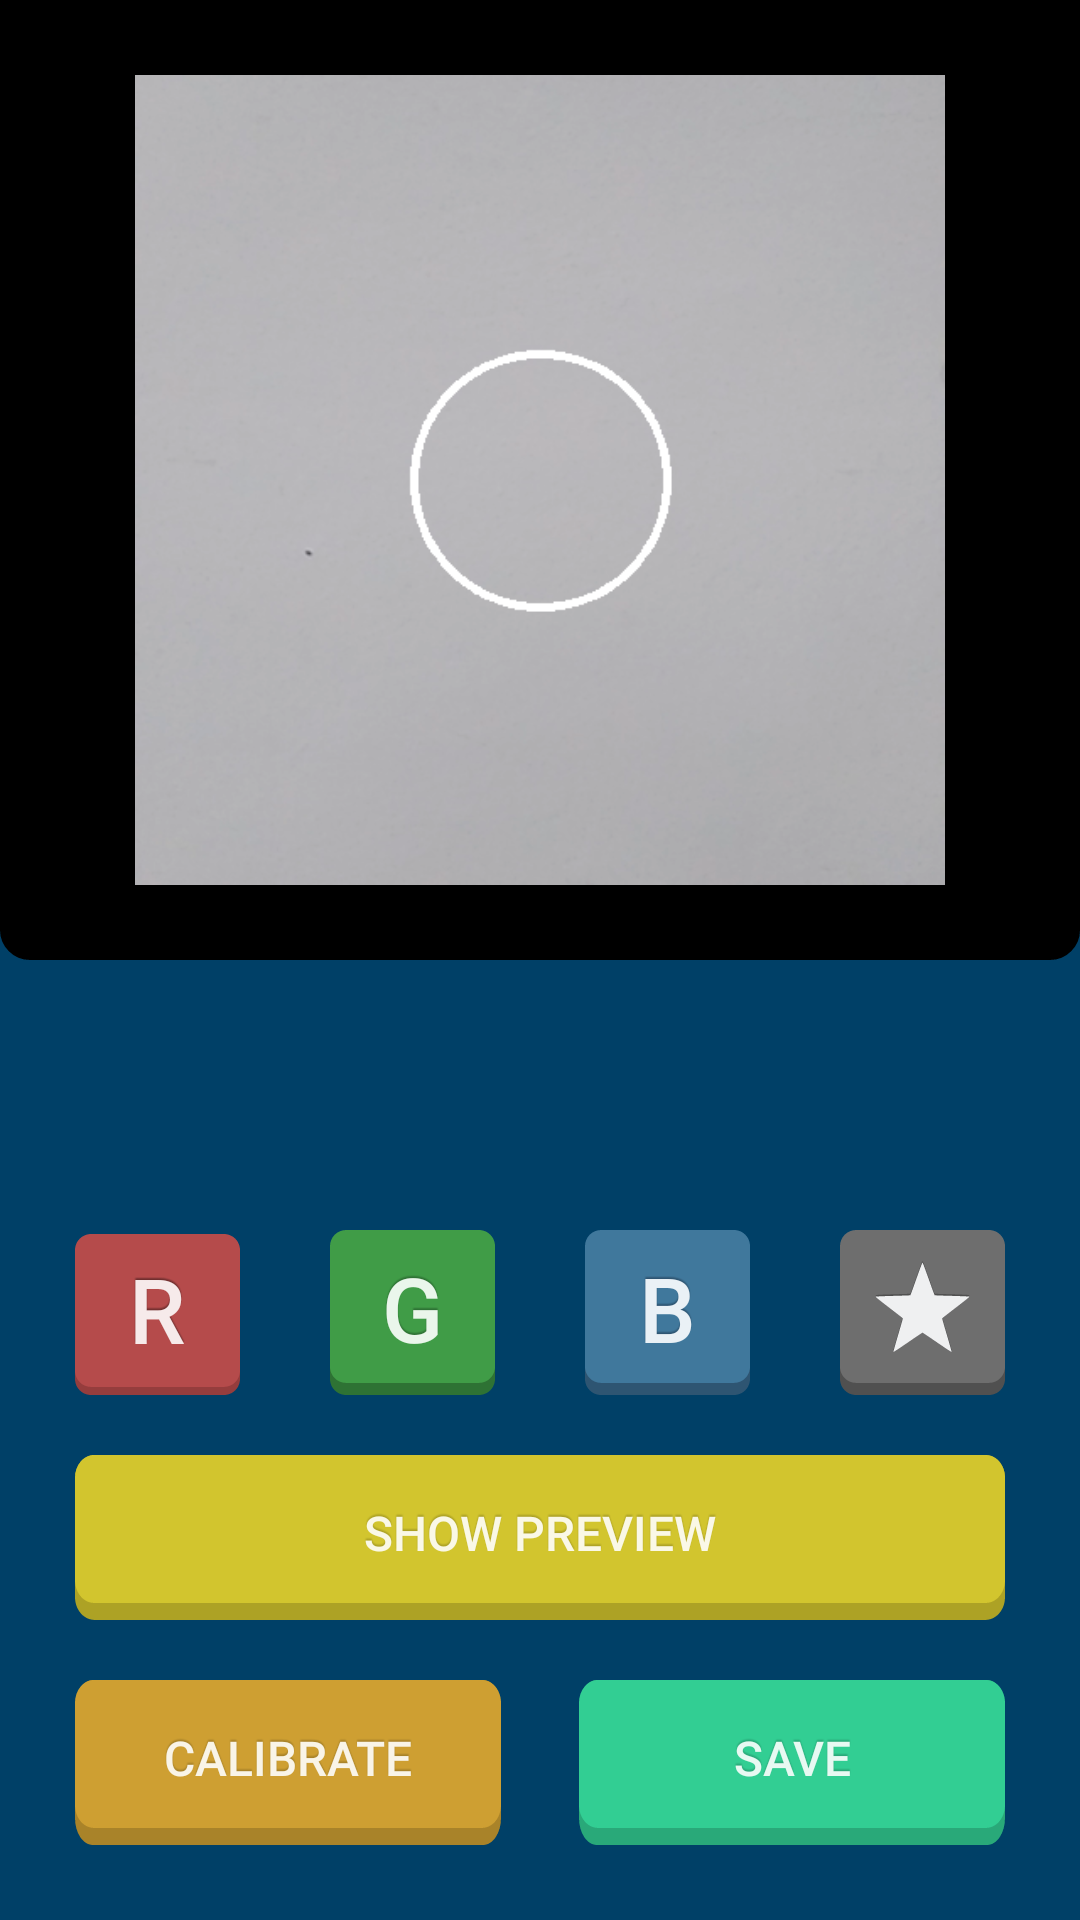
We must select between one of the four colors to calibrate (red, green, blue or customized), fit in the circular area the object of the color to be calibrated, and click on calibrate. This will mean that, until a new calibration is made, the application takes that color reference as the value to be detected. The custom value can be used to add a different color of red, green and blue in the programming.
By clicking on show preview, we can see the color that has been stored as reference for calibration. It is important that this preview shows as much of the object as possible. If we click on save, the new calibration is established.
On the Robobo wiki page, we have added a small tutorial about how to calibrate the camera colors in a more robust way:
https://bitbucket.org/mytechia/robobo-programming/wiki/camera-calibration
RUN TUTORIAL
This option runs the Robobo presentation tutorial. It is recommended the execution of this tutorial with Robobo on the floor, since it will move to show some of its capabilities. You can exit the tutorial at any time by pressing the back button of the smartphone, which will return the application to the main menu.
UPDATE FIRMWARE
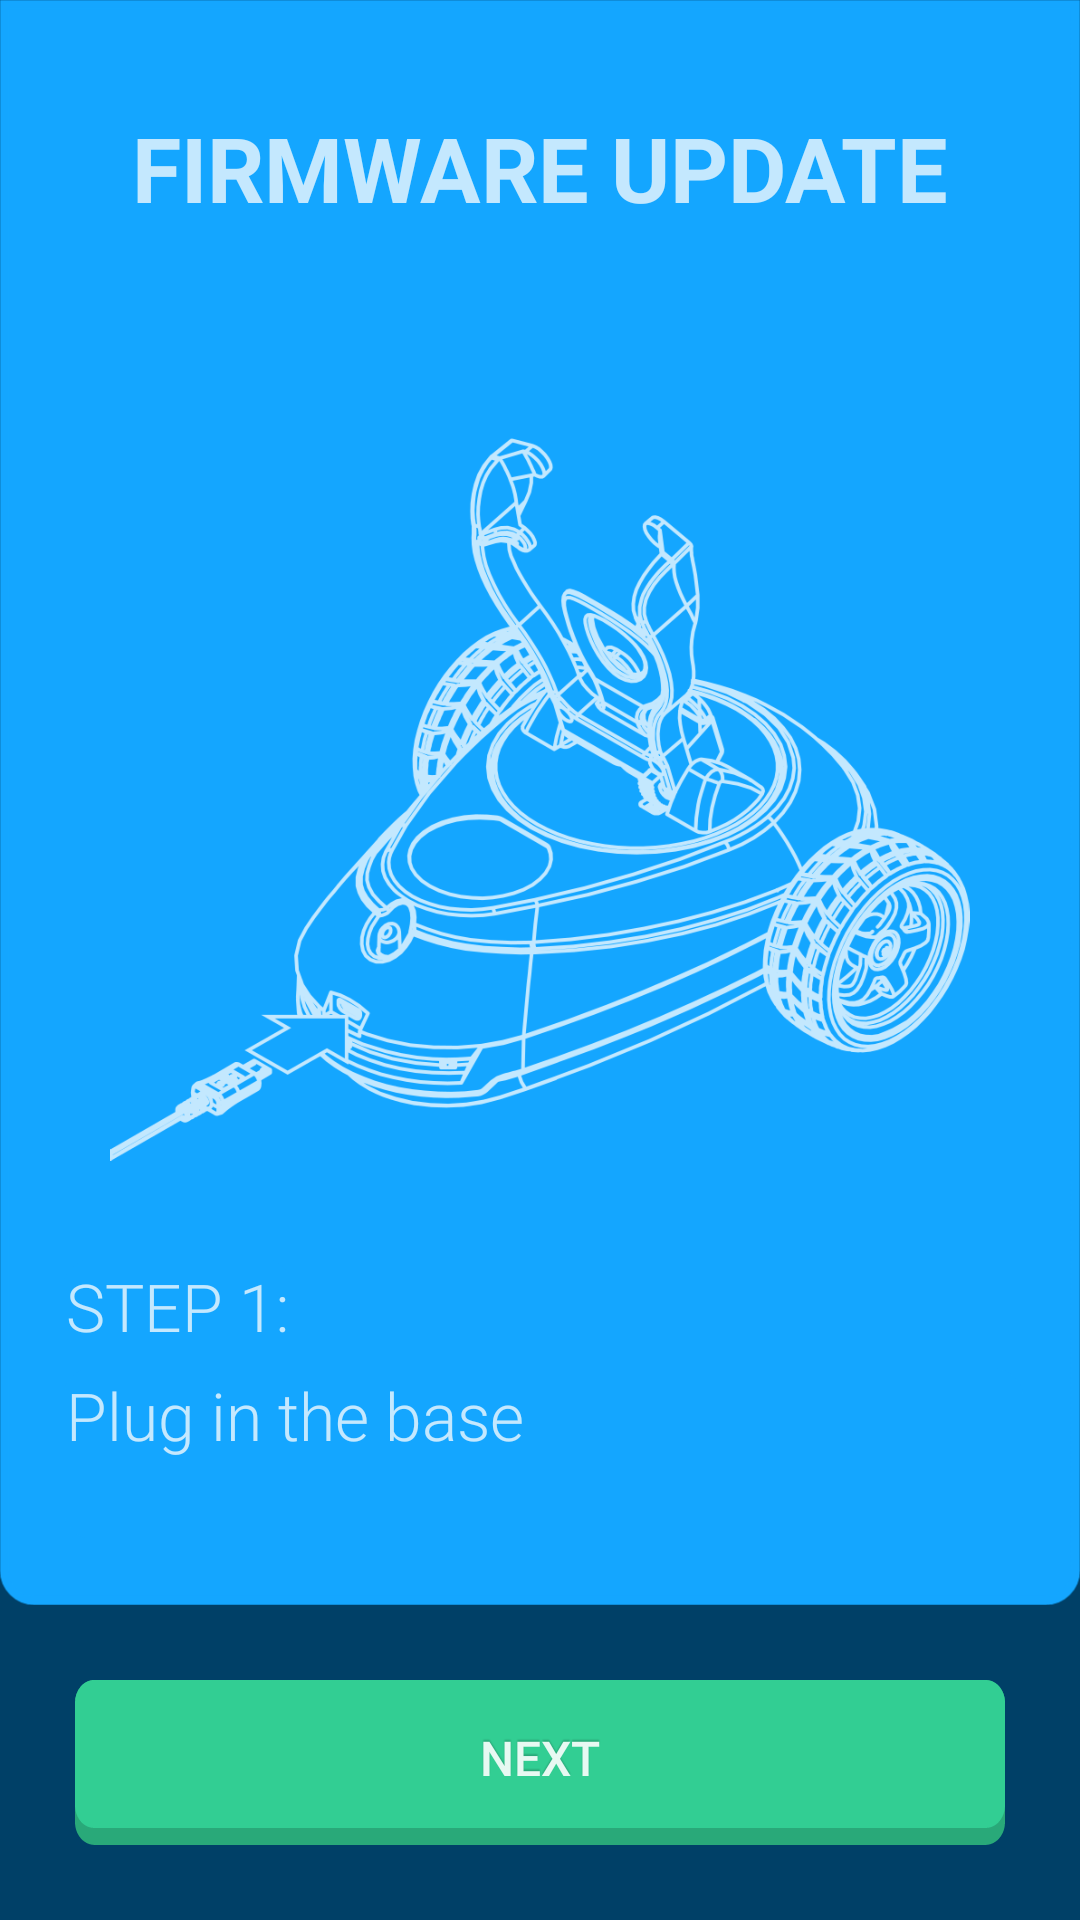
It enters firmware update mode. To update the Robobo base firmware, you must follow the following steps carefully:
In the first screen, ‘STEP 1’, you must connect the Robobo base to the power supply (it can be connected to a USB port in a laptop or desktop computer, but it is preferable to connect it to an electric outlet). Once it is plugged, then press the NEXT button.
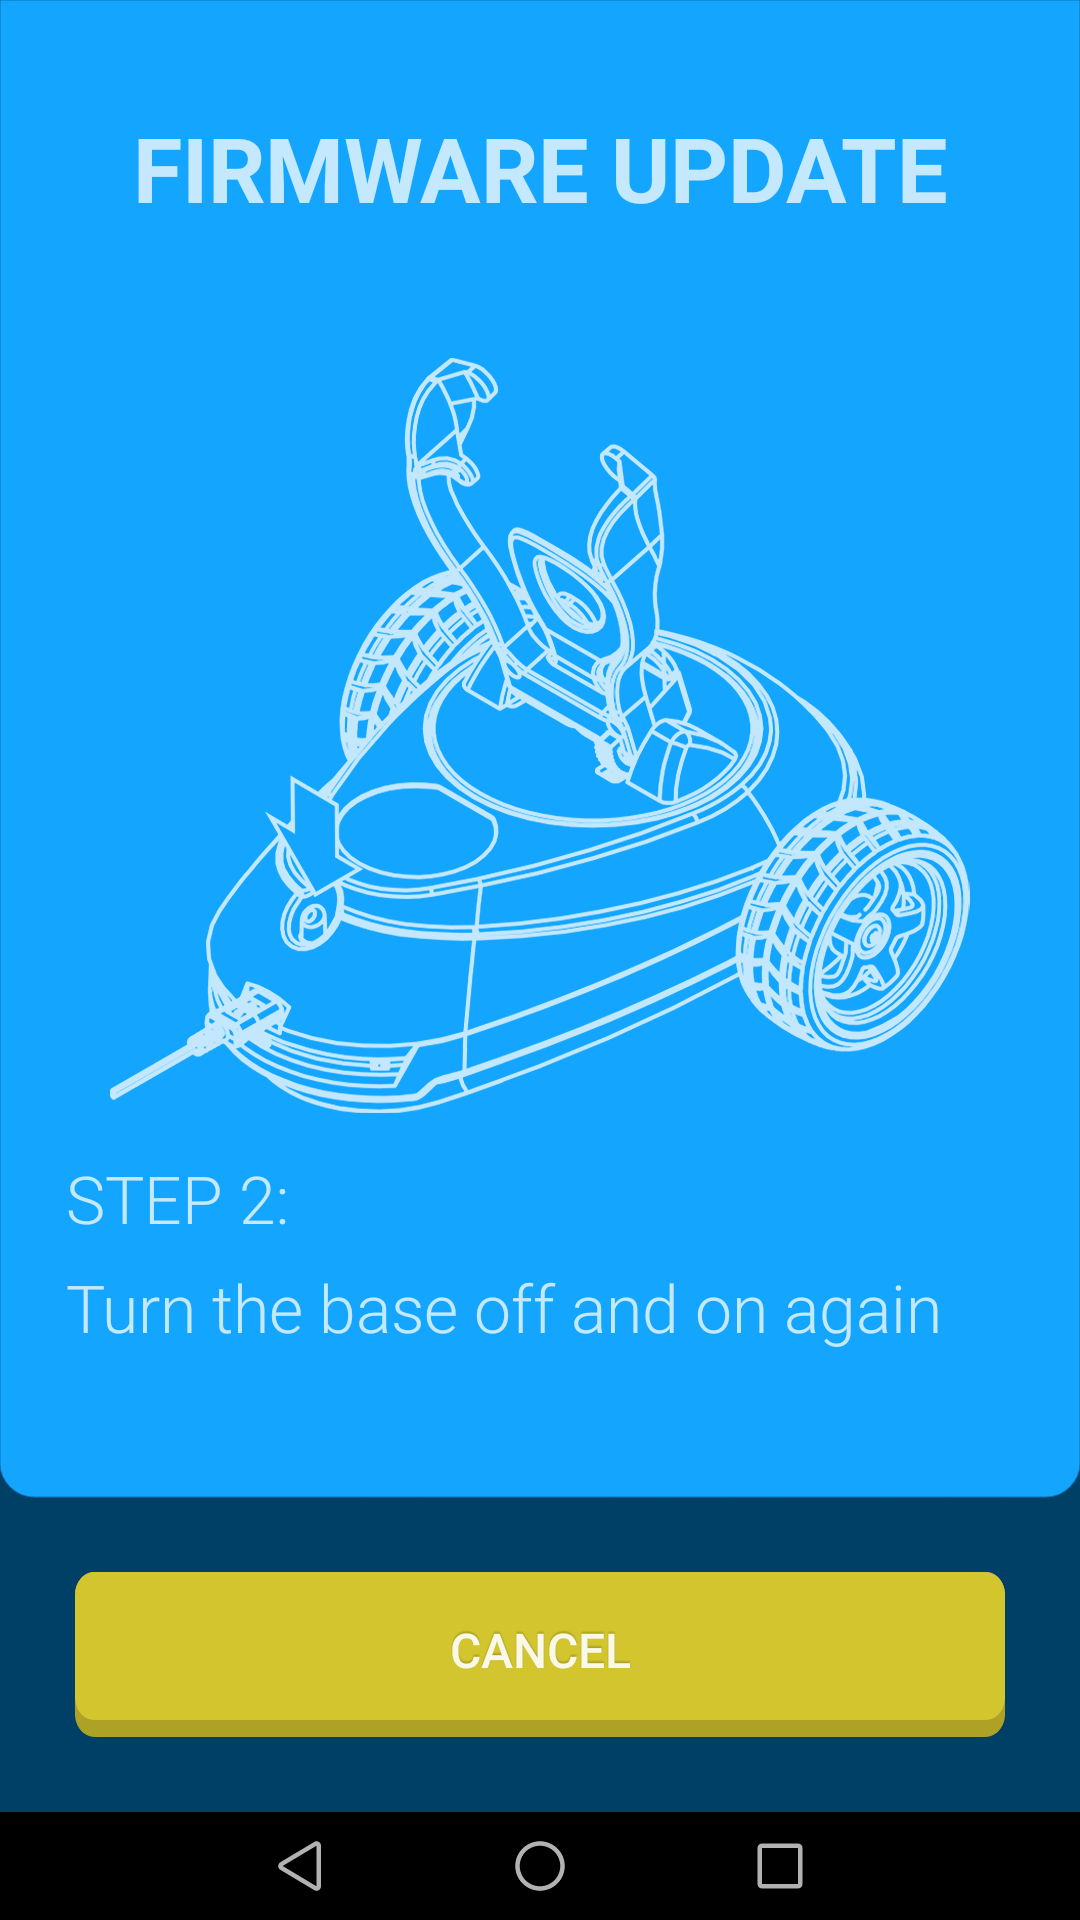
A second screen appears, ‘STEP 2’, and you must turn off and on the Robobo base, without unplugging the power cord. The Robobo base will enter in firmware update mode, which is indicated by a flashing of the left rear LED of the base.
The application will remain paused until it detects that the base has been restarted in firmware update mode, and then it will show a screen similar to this one:
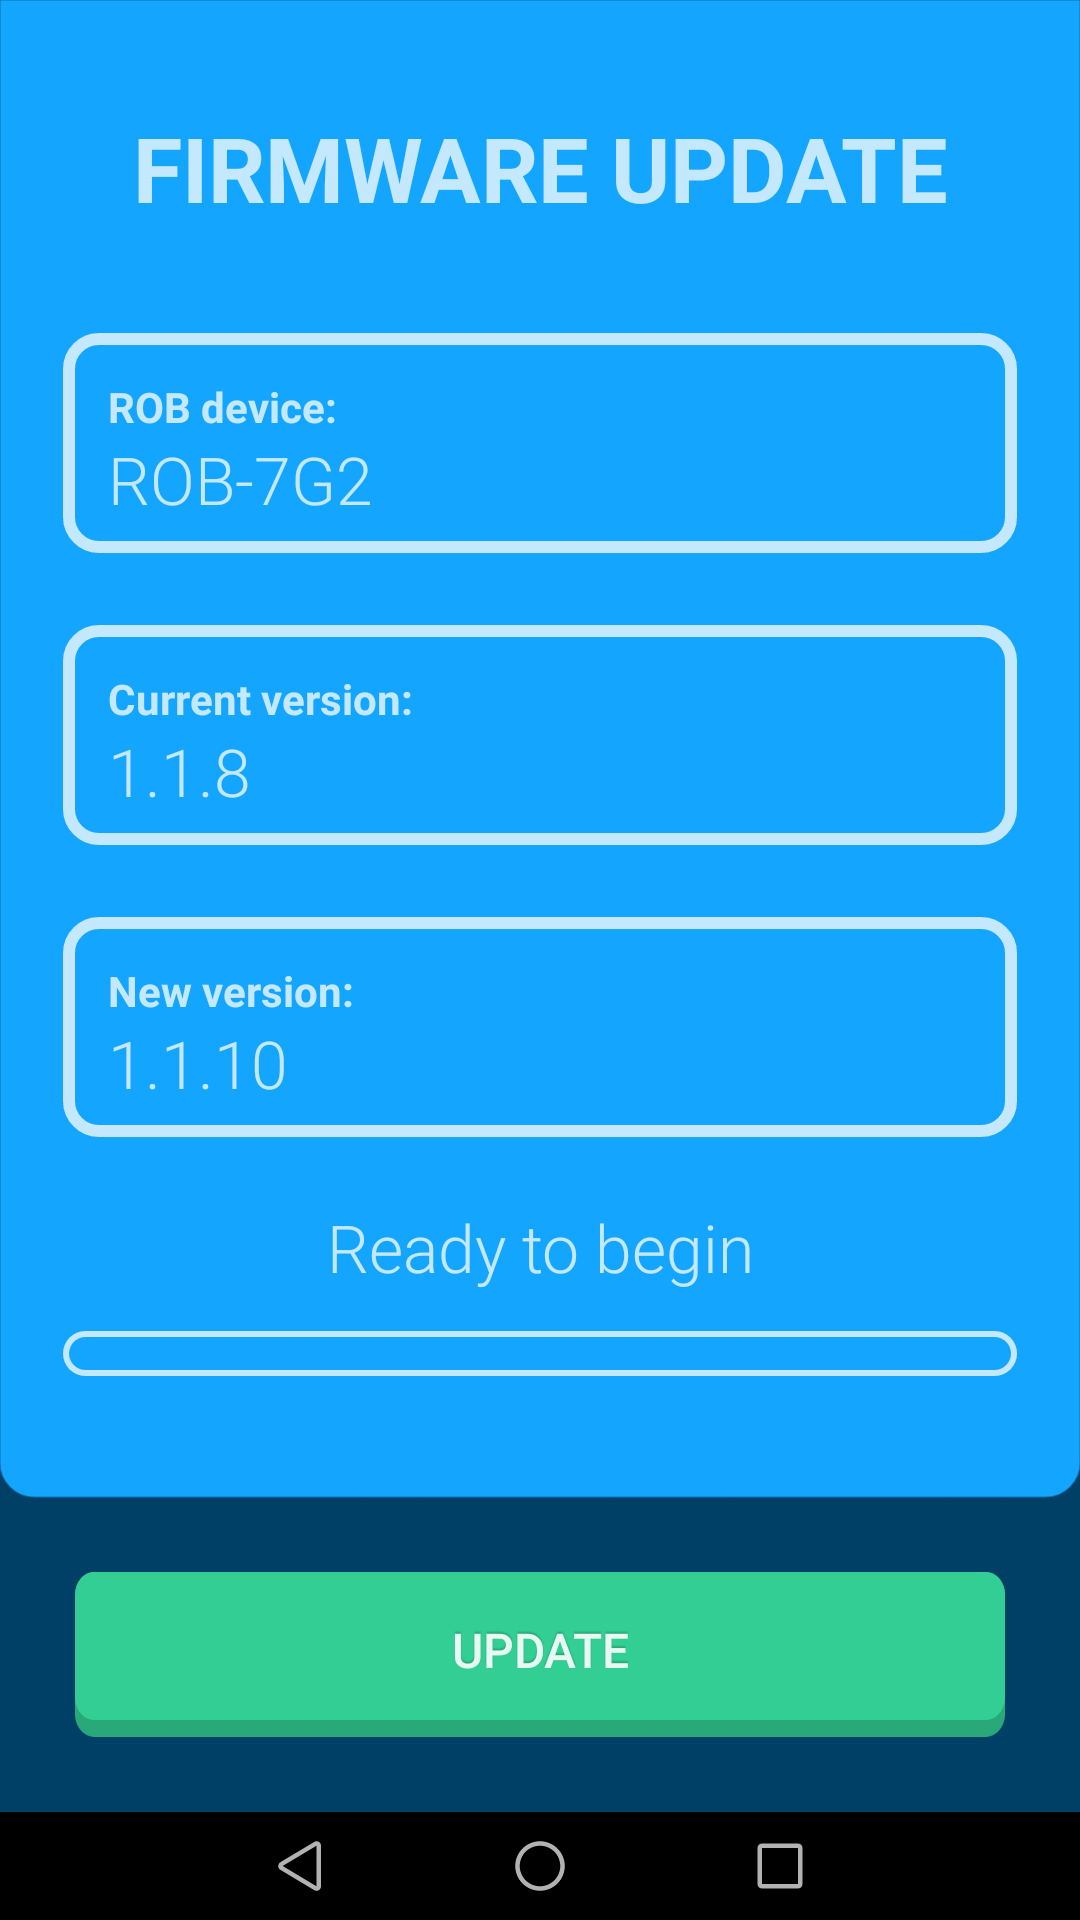
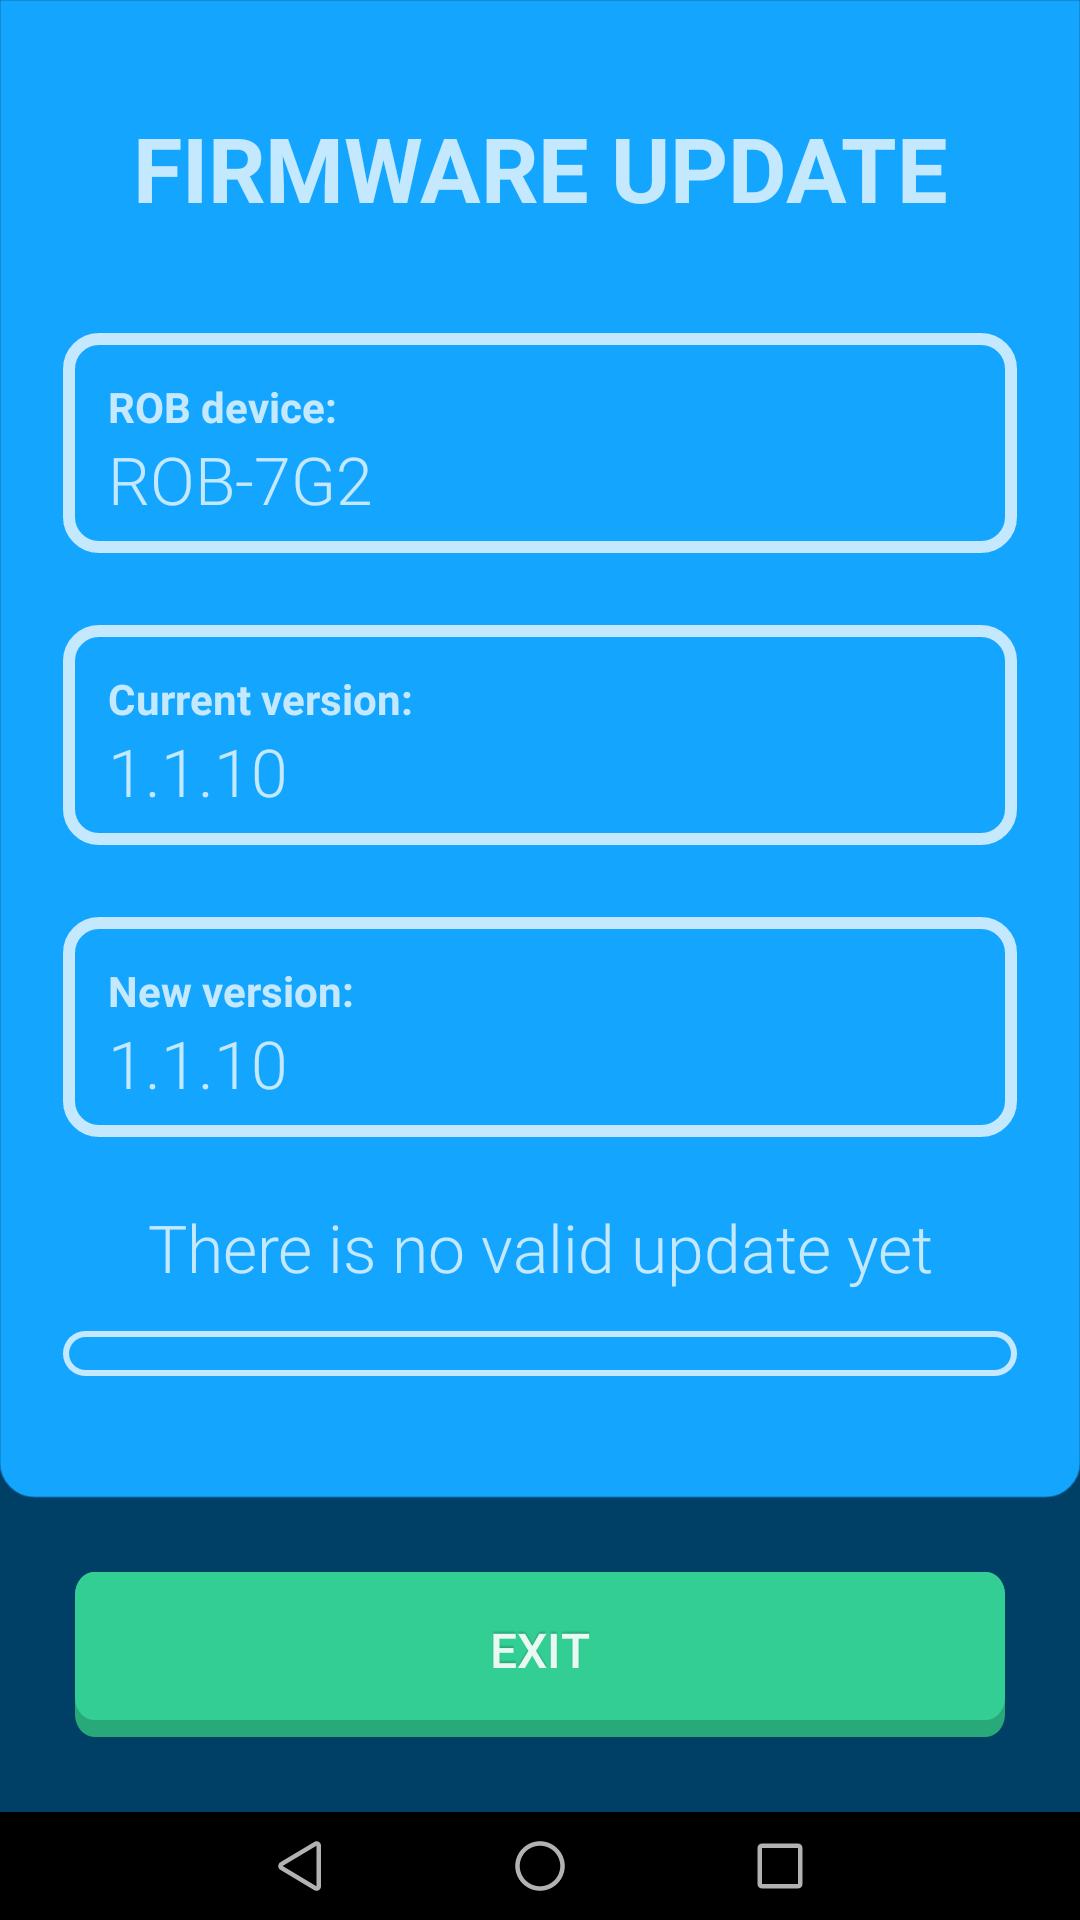
The following base’s firmware information will be displayed:
- Name of the Robobo base to update.
- Current firmware version detected in the Robobo base.
- Version of the latest firmware available.
In case the base already has the latest firmware version, the update button will appear disabled, and you must cancel the update process by pressing the back button of the smartphone:
If a new firmware version is available, the UPDATE button will be activated and you can launch the update process by pressing such button, like for instance:

Once the update process is started, the status of the firmware update process will be indicated on the screen. It usually lasts a few minutes, and it is important that during this process you do not turn off the Robobo base, do not close the Robobo app, and do not move the smartphone away from the Robobo base. In any of those cases, the update could fail. If the process is successful, a screen similar to this will appear:
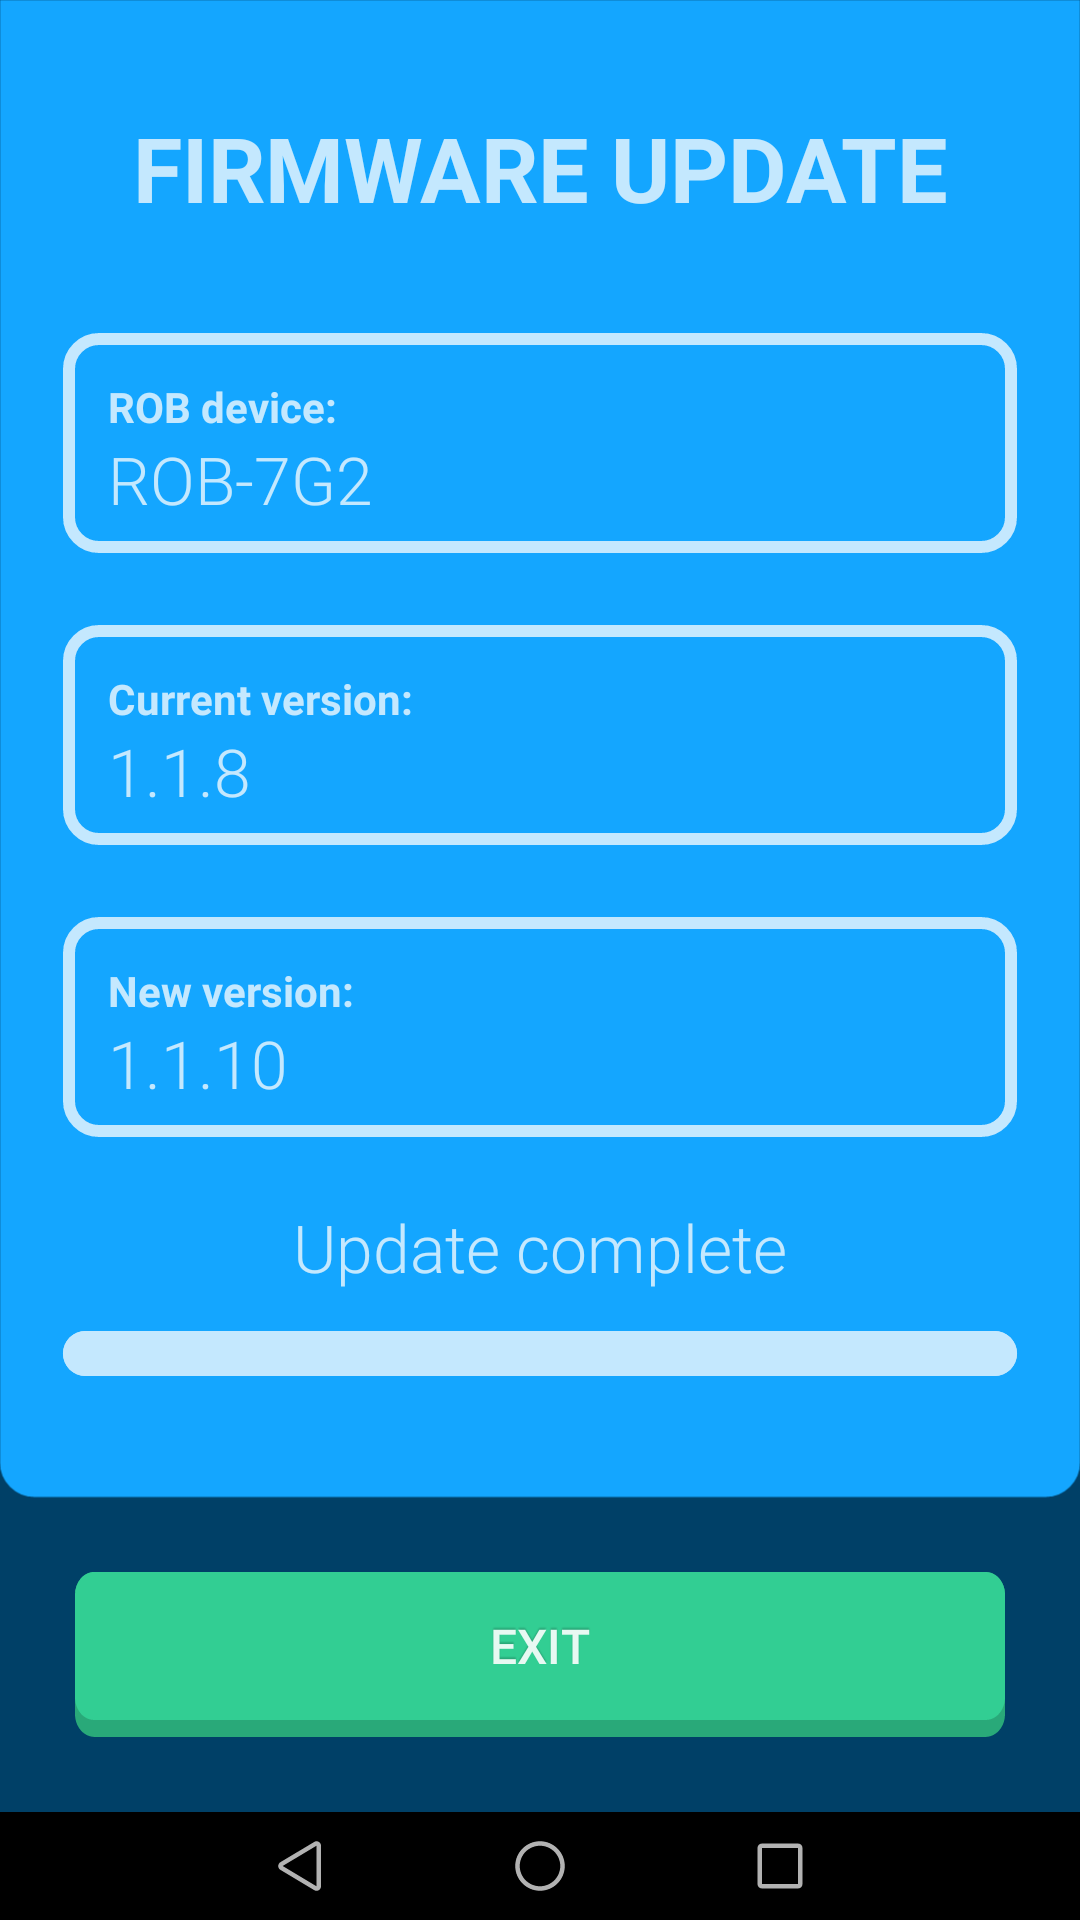
Once the update is completed correctly, the Robobo base will automatically restart with the latest firmware.
In case of a failure during the firmware update, either because the base has been turned off during the process, or there has been a connection problem between the smartphone and the base, the firmware of the base will be disabled, and therefore, the base will not be usable. In such case, the base will always start in ‘firmware update’ mode, indicating it by the flickering of the left rear LED. If so, it will be essential to carry out the firmware update process again from the beginning in order to correctly load a new firmware into the base. In these cases, the firmware update screen will indicate, as the current firmware version, the base version ‘0.0.0’. You must proceed to update firmware again by pressing the UPDATE button:

RESET CONFIGURATION VALUES
This option returns the language and camera calibration settings to default values. If a custom configuration of the camera has been made, with this restoration, that configuration will be lost and the default configuration will be returned.
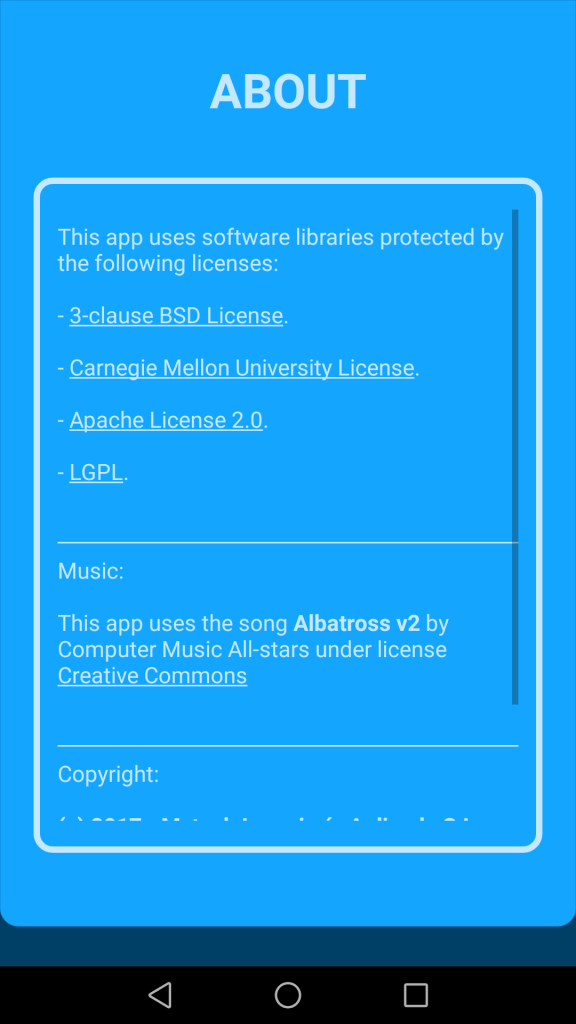
ABOUT
In this option, you can view information about the licenses of the software libraries and music pieces used in the app as well as information about the copyright of the software.